Loading...
Loading...
Loading...
Loading...
Loading...
Loading...
Loading...
Loading...
Loading...
Loading...
Loading...
Loading...
Loading...
Loading...
Loading...
Loading...
Loading...
Loading...
Loading...
Loading...
Loading...
Loading...
Loading...
Loading...
Loading...
Loading...
Loading...
Loading...
Loading...
Loading...
Loading...
Loading...
Loading...
Loading...
Loading...
Loading...
Loading...
Loading...
Loading...
Loading...
Loading...
Loading...
Loading...
Loading...
Loading...
Loading...
Loading...
Loading...
Loading...
Loading...
Loading...
Loading...
Loading...
Loading...
Loading...
Loading...
Loading...
Loading...
Loading...
Loading...
Loading...
Loading...
Loading...
Loading...
Loading...
Loading...
Loading...
Loading...
Loading...
Loading...
Loading...
Loading...
Loading...
Loading...
Loading...
Loading...
Loading...
Loading...
Loading...
Loading...
Loading...
Loading...
Loading...
Loading...
Loading...
Loading...
Loading...
Loading...
Loading...
Loading...
Loading...
Loading...
Loading...
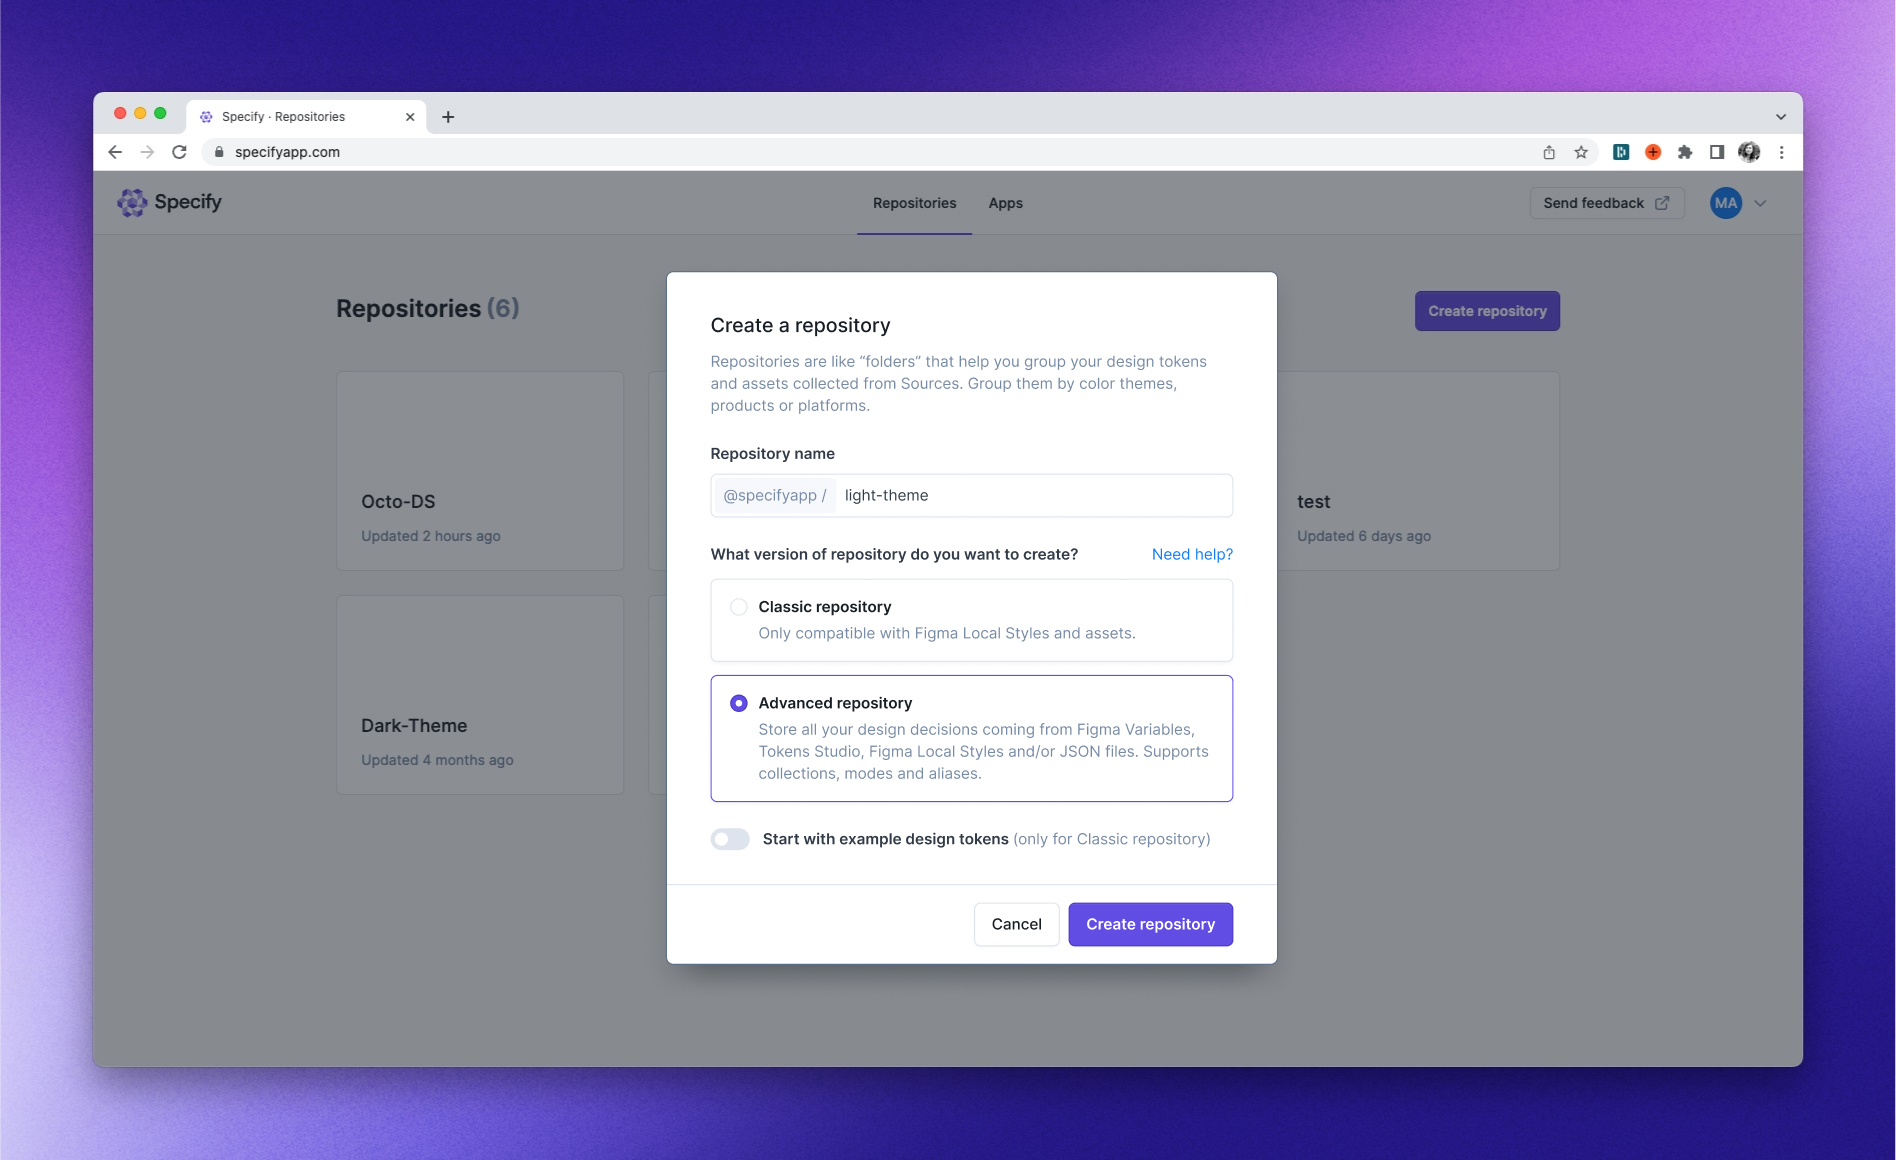
The first Design Token Engine allowing you to send your design tokens across your design system tools. Specify is built with this idea: configure once, synchronize anytime.
List of all integrations you can use with Specify to collect design tokens and assets from.
List of all integrations you can use with Specify to distribute design tokens and assets to.
A 5min guide on collecting and pulling your first design tokens with the Specify CLI.
npm install -D @specifyapp/cliyarn install -D @specifyapp/clipnpm install @specifyapp/cli -Dbun add @specifyapp/cli --devconst query: SDTFQuery = {
where: {
collection: '^MyCollection$',
andWhere: {
group: '^MyGroup$',
andWhere: {
token: '.*',
select: true,
},
},
},
};curl -sL https://static.specifyapp.com/cli/install.sh | shcurl -sL https://static.specifyapp.com/cli/install.sh | VERSION="x.y.z" shTake some time to understand the basic concepts of Specify. Getting to know its foundational ideas will help you glimpse into how to leverage the apps and APIs in your projects.
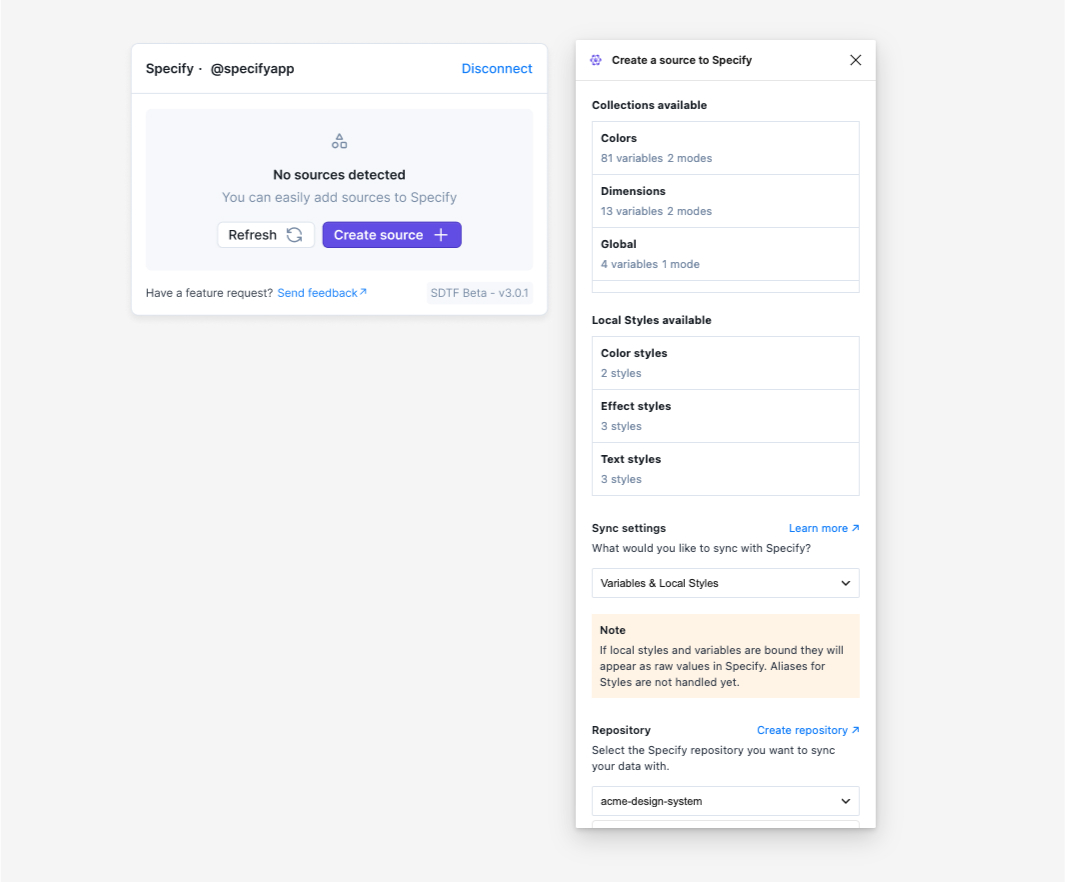
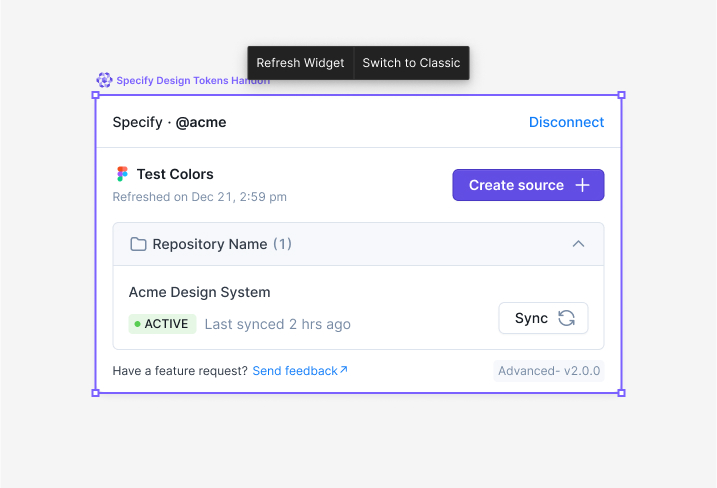
In this guide, you’ll learn how to sync your Figma Variables and/or Styles to a Specify Repository and how to keep them updated.


curl -sL https://static.specifyapp.com/cli/install.sh | shmodule.exports = {
version: "2",
repository: '@workspace/repository',
personalAccessToken: '<your-personal-access-token>',
rules: [],
};{
"version": "2",
"repository": "@workspace/repository",
"personalAccessToken": "<your-personal-access-token>",
"rules": []
}module.exports = {
version: "2",
repository: '@workspace/repository',
personalAccessToken: '<your-personal-access-token>',
rules: [],
};{
"version": "2",
"repository": "@workspace/repository",
"personalAccessToken": "<your-personal-access-token>",
"rules": []
}module.exports = {
version: "2",
repository: '@workspace/repository',
personalAccessToken: '<your-personal-access-token>',
rules: [
{
name: "Generate tokens as CSS Custom Properties",
parsers: [
{
name: "to-css-custom-properties",
output: {
type: "file",
filePath: "tokens.css"
}
}
]
}
]
};{
"version": "2",
"repository": "@organization/repository",
"personalAccessToken": "<your-personal-access-token>",
"rules": [
{
"name": "Generate tokens as CSS Custom Properties",
"parsers": [
{
"name": "to-css-custom-properties",
"output": {
"type": "file",
"filePath": "tokens.css"
}
}
]
}
]
}specify pull


SPECIFY_PAT=xxxxxxxxxxxxxxxxxx specify pull \
-C "my-custom-config.json" \
-r "<@your-organization/your-repository-name>"{
"rules": [
{
"name": "Generate tokens as CSS Custom Properties",
"parsers": [
{
"name": "to-css-custom-properties", // parser name
"output": {
"type": "file",
"filePath": "public/css/tokens.css" // ouput will be a file
},
"options": { // parser specific options
"tokenNameTemplate": "--{{groups}}-{{token}}",
"selectorTemplate": "[data-theme=\"{{mode}}\"]"
}
}
]
}
]
}{
"version": "2",
"rules": [
{
"name": "Export All Tokens and Assets In a JSON File In SDTF",
"parsers": [
{
"name": "to-sdtf",
"output": {
"type": "file",
"filePath": "sdtf.json"
}
}
]
}
]
}sdtfEngine.[method]function renderJSONTree(param: {
renderOptions:
| {
resolveAliases: true;
allowUnresolvable?: AllowUnresolvable;
targetMode?: TargetMode;
}
| { resolveAliases: false };
}): JSON;https://api.specifyapp.com/v2SPECIFY_PAT=xxxxxxxxxxxxxxxxxx specify pullconst results: ParsersEngineResults = await SDTFClient.createParsersPipelines({ ... })(){
"repository": "<@your-organization/your-repository-name>"
"version": "2",
"personalAccessToken": "xxxxxxxxxxxxxxxxxxxxxxxxxxxxxxxxxxxxxxxxxxxxxxxxxxxxxxxxxxxxxxxx"
"rules": []
}module.export = {
repository: '<@your-organization/your-repository-name>'
version: '2',
personalAccessToken: 'xxxxxxxxxxxxxxxxxxxxxxxxxxxxxxxxxxxxxxxxxxxxxxxxxxxxxxxxxxxxxxxx'
rules: []
}export default {
repository: '<@your-organization/your-repository-name>'
version: '2',
personalAccessToken: 'xxxxxxxxxxxxxxxxxxxxxxxxxxxxxxxxxxxxxxxxxxxxxxxxxxxxxxxxxxxxxxxx'
rules: []
}import type { SpecifyCLIConfigurationV2File } from '@specifyapp/sdk/bulk"'
const config: SpecifyCLIConfigurationV2File = {
repository: '<@your-organization/your-repository-name>',
version: '2',
personalAccessToken: 'xxxxxxxxxxxxxxxxxxxxxxxxxxxxxxxxxxxxxxxxxxxxxxxxxxxxxxxxxxxxxxxx'
rules: []
}
export default config;{
"Text styles": {
"Body": {
"$type": "textStyle",
"$value": {
"default": {
"font": {
"family": "Neue Haas Grotesk Text Pro",
"postScriptName": "Neue Haas Grotesk Text Pro",
"weight": "roman",
"style": "normal",
"files": []
},
"fontSize": {
"value": 14,
"unit": "px"
},
"color": null,
"fontFeatures": null,
"lineHeight": {
"value": 150,
"unit": "%"
},
"letterSpacing": {
"value": 0.2,
"unit": "px"
},
"paragraphSpacing": {
"value": 0,
"unit": "px"
},
"textAlignHorizontal": null,
"textAlignVertical": null,
"textDecoration": "none",
"textIndent": {
"value": 0,
"unit": "px"
},
"textTransform": "none"
}
}
}
}
}Authorization: PAT <your-personal-access-token>Content-Type: application/json
Authorization: PAT <your-personal-access-token>specify --personal-access-token xxxxxxxxxxxxxxxxxx pullauthenticate(personalAccessToken: string): Promise<void>;whoAmI(): {
email: string;
id: string;
username: string;
fullname: string;
organizations: {
id: string;
namespace: string;
domain: string | null;
}[];
} | null;logout(): void;getRepositories(): Promise<{
name: string;
id: string;
version: number;
createdAt: string;
updatedAt: string;
}[]>;getSDTFClientByRepositoryName(repositoryName: string): Promise<SDTFClient>;transformTokenTreeWithRemoteParsers(
sdtfTree: SpecifyDesignTokenFormat,
parsers: PipeEngineParserConfiguration
): Promise<{
fromRule: string;
output: PipeEngineRuleOutput
}>;get isContinuous(): boolean;merge(dedupeFn?: MergeDedupeFn): {
treeState: TreeState;
};hasNodeType(nodeType: 'collection' | 'group' | 'token'): boolean;hasOnlyNodeType(nodeType: 'collection' | 'group' | 'token'): boolean;type QueryResultDetail = {
isRoot: boolean;
parentPath: Array<string>;
isComplete: boolean;
nodes: Array<SDTFNodeState>;
sdtf: SpecifyDesignTokenFormat;
};
render(): Array<QueryResultDetail>;getPaths(type: 'string'): Array<string>;
getPaths(type: 'array'): Array<Array<string>>;
getPaths(type?: undefined): Array<string>;toJSON(): {
isContinuous: boolean;
graphs: {
isRoot: boolean;
parentPath: string[];
isComplete: boolean;
sdtf: SpecifyDesignTokenFormat;
}[];
};get all: Array<ParsersEngineResult>;get hasError: boolean;get hasWarning: boolean;get allErrorMessages: ParsersEngineErrorMessage[];get allWarningMessages: ParsersEngineWarningMessage[];get allInformationMessages: ParsersEngineInformationMessage[];logErrorMessages(): void;logWarningMessages(): void;logInformationMessages(): void;debug(options?: {
withOutputContent?: boolean;
}): void;mapOutput(fn: (output: ParserOutput | null) => ParserOutput | null | void): this;mapFiles(fn: (file: FilesOutput['files'][number]) => FilesOutput['files'][number] | void): this;writeToDisk(directoryPath?: string): Promise<{
errors: Array<any>;
outputPaths: Array<string>;
}>;serialize(): SerializedParsersEngineResults;{
"version": "2",
"repository": "@organization/repository",
// Only use the personalAccessToken when working with the CLI
"personalAccessToken": "<your-personal-access-token>",
"rules": [
{
"name": "Make line height relative",
"parsers": [
{
"name": "make-line-height-relative",
"options": {}
},
{
"name": "to-sdtf",
"output": {
"type": "file",
"filePath": "public/tokens.json"
}
}
]
}
]
}{
"Text styles": {
"Body": {
"$type": "textStyle",
"$value": {
"default": {
"font": {
"family": "Neue Haas Grotesk Text Pro",
"postScriptName": "Neue Haas Grotesk Text Pro",
"weight": "roman",
"style": "normal",
"files": []
},
"fontSize": {
"value": 14,
"unit": "px"
},
"color": null,
"fontFeatures": null,
"lineHeight": {
"value": 1.5,
"unit": null
},
"letterSpacing": {
"value": 0.2,
"unit": "px"
},
"paragraphSpacing": {
"value": 0,
"unit": "px"
},
"textAlignHorizontal": null,
"textAlignVertical": null,
"textDecoration": "none",
"textIndent": {
"value": 0,
"unit": "px"
},
"textTransform": "none"
}
}
}
}
}interface parser {
name: 'make-line-height-relative';
options: {};
}import { updaters } from '@specifyapp/sdk'import { updaters } from '@specifyapp/sdk'
sdtfClient.update(updaters.color({ toFormat: 'hex' }, { where: { token: '^color-' }}))import { updaters } from '@specifyapp/sdk'
sdtfClient.update(updaters.changeCase({ toFormat: 'kebabCase' }, { where: { token: '.*' }}))import { updaters } from '@specifyapp/sdk'
sdtfClient.update(updaters.dimension(
{ toFormat: 'rem', baseValue: { rem: 12 } },
{ where: { token: '^spacing-' }}
)import { updaters } from '@specifyapp/sdk'
sdtfClient.update(
updaters.dimension(
{ toFormat: 'rem', baseValue: { rem: 12 } },
{ where: { token: '^spcacing-' }}
),
updaters.nameCase({ toFormat: 'kebabCase' }, { where: { token: '.*' }}),
updaters.color({ toFormat: 'hex' }, { where: { token: '^color-' }})
)import { updaters } from '@specifyapp/sdk'
sdtfClient
.withQuery({ where: { token: '*' }})
.update(
updaters.dimension(
{ toFormat: 'rem', baseValue: { rem: 12 } },
),
updaters.nameCase({ toFormat: 'kebabCase' }),
updaters.color({ toFormat: 'hex' })
)import type { SDTFQuery, SDTFEngine } from '@specifyapp/specify-design-token-format'
function myUpdater(
options?: {}
applyTo?: SDTFQuery,
): Updater {
return (engine: SDTFEngine, applyToInner?: SDTFQuery) => {
const query = applyTo ?? applyToInner;
// Do the conversion
};
}
sdtfClient.update(myUpdater())import type { SDTFEngine } from '@specifyapp/specify-design-token-format'
function myUpdater(engine: SDTFEngine) {
// Do something
}
sdtf.update(myUpdater).env file in a JavaScript config fileimport path from 'node:path
const path = require('
On this page you'll find a lot of common actions you'll probably want to perform when using the SDK
This template helps you pull your design tokens in JSON.
This template helps you pull your design tokens in the SDTF format in a JSON file.
This template helps you generate your design tokens in a dart file and icons as SVG files.
SPECIFY_ACCESS_TOKEN=ab83f8f49f5c65456c7b1fe70efbc804aa08f87150214aa984d4125945ed8283bashspecify pull -p $SPECIFY_TOKENimport { createSpecifyClient } from "@specifyapp/sdk";
const specifyClient = createSpecifyClient();
await specifyClient.authenticate("<YOUR_PERSONAL_ACCESS_TOKEN_VAR>");
const sdtfClient =
await specifyClient.getSDTFClientByRepositoryName("<YOUR_SPECIFY_REPO_NAME>");
console.log('Repository name',sdtfClient.repository.name)interface parser {
name: 'svg-to-tsx';
output: {
type: 'directory';
directoryPath: string;
};
options?:{
reactVersion?: string; // default to 17.0.0
filePrefix?: string;
fileSuffix?: string;
exportDefault?: boolean;
tokenNameTemplate?: string;
}
}interface parser {
name: 'to-bitmap-file';
options: {
filenameTemplate: string;
};
output: {
type: 'directory';
directoryPath: string;
};
};interface parser {
name: 'to-file';
options: {
filenameTemplate: string;
};
output: {
type: 'directory';
directoryPath: string;
};
};
{
"assets": {
"image": {
"$type": "bitmap",
"$value": {
"1x": {
"url": "<url-of-your-bitmap-file>",
"format": "png",
"width": 623,
"height": 415,
"variationLabel": null
}
}
}
}
}{
"version": "2",
"repository": "@organization/repository",
// Only use the personalAccessToken when working with the CLI
"personalAccessToken": "<your-personal-access-token>",
"rules": [
{
"name": "Generate images",
"parsers": [
{
"name": "to-bitmap-file",
"output": {
"type": "directory",
"directoryPath": "public"
}
}
]
}
]
}{
"fonts": {
"inter-regular": {
"$type": "font",
"$value": {
"default": {
"family": "Inter Regular",
"postScriptName": "Inter Regular",
"weight": "regular",
"style": "normal",
"files": [
{
"format": "ttf",
"url": "https://static.specifyapp.com/sdtf-seeds/inter-regular.ttf",
"provider": "Specify"
}
]
}
}
}
}
}{
"version": "2",
"repository": "@organization/repository",
// Only use the personalAccessToken when working with the CLI
"personalAccessToken": "<your-personal-access-token>",
"rules": [
{
"name": "Generate tokens in JSON",
"parsers": [
{
"name": "to-json",
"output": {
"type": "file",
"filePath": "output/tokens.json"
}
}
]
}
]
}{
"version": "2",
"repository": "@organization/repository",
// Only use the personalAccessToken when working with the CLI
"personalAccessToken": "<your-personal-access-token>",
"rules": [
{
"name": "Generate tokens in SDTF",
"parsers": [
{
"name": "to-sdtf",
"output": {
"type": "file",
"filePath": "output/tokens.json"
}
}
]
}
]
}getGroupStateimport { updaters } from '@specifyapp/sdk'
sdtfClient.update(
updaters.color({ toFormat: 'hex' }, { where: { token: '^color-' }}),
);import {
dimensionToCss,
breakpointToCss,
colorToCss,
createResolveAliasStrategy
} from '@specify/sdk/css'
const strategy = createResolveAliasStrategy();
const outputs = sdtfClient.mapTokenStates(tokenState =>
tokenState.matchByType(
{
dimension: dimensionToCss(strategy) // Output example: '12px'
breakpoint: breakpointToCss(strategy) // Output example: '12px'
color: colorToCss(strategy) // Output example: '#ff00ff'
},
_ => undefined
)
);import { parsers } from '@specify/sdk'
const executePipelines = sdtfClient
.createParsersPipelines(
parsers.toCssCustomProperties({ filePath: 'myFile.css' }),
);
const parsersEngineResults = await executePipelines();const tokenState = sdtfClient.getTokenState(['path', 'to', 'token']);const tokenStates = sdtfClient.getAllTokenStates();const results = sdtfClient.mapTokenStates(tokenState => ...);const group = sdtfClient.getGroupState(['path', 'to', 'myGroup']);const groups = sdtfClient.getAllGroupStates();const results = sdtfClient.mapGroupStates(tokenState => ...);const collection = sdtfClient.getCollectionState(['path', 'to', 'myCollection']);const collections = sdtfClient.getAllCollectionStates();const results = sdtfClient.mapCollectionStates(tokenState => ...);const colors = sdtfClient.pick(['colors']);const colors = sdtfClient.pick(['colors', '*']);const colorAndTextStyleOnlySdtf = sdtfClient.query({
where: {
token: '.*',
withTypes: {
include: ['color', 'textStyle']
}
}
});sdtfClient
.remove({ where: { token: '^Blue$', select: true } })sdtfClient.renameNode({ atPath: ['my', 'path' ], name: 'newName' });sdtfClient.renameNode({
atPath: ['my', 'path' ],
name: 'newName',
type: 'collection'
});sdtf.renameNode({
atPath: ['my', 'path' ],
name: 'newName',
type: 'group'
});sdtf.renameNode({
atPath: ['my', 'path' ],
name: 'newName',
type: 'token'
});17.0.0{
"icons": {
"menu": {
"$type": "vector",
"$value": {
"default": {
"variationLabel": null,
"format": "svg",
"url": "<url-of-your-svg-file>"
}
}
}
}
}{
"name": "Generate vectors as TSX components",
"parsers": [
{
"name": "svg-to-tsx",
"output": {
"type": "directory",
"directoryPath": "output/assets"
}
}
]
}export default () => (
<svg width="20" height="20" viewBox="0 0 20 20" fill="none" xmlns="http://www.w3.org/2000/svg">
<path d="M9.25 9.25V3.5H4C3.72386 3.5 3.5 3.72386 3.5 4V9.25H9.25ZM9.25 10.75H3.5V16C3.5 16.2761 3.72386 16.5 4 16.5H9.25V10.75ZM10.75 16.5H16C16.2761 16.5 16.5 16.2761 16.5 16V10.75H10.75V16.5ZM4 18C2.89543 18 2 17.1046 2 16V4C2 2.89543 2.89543 2 4 2H10H16C17.1046 2 18 2.89543 18 4V10V16C18 17.1046 17.1046 18 16 18H4ZM16.5 9.25V4C16.5 3.72386 16.2761 3.5 16 3.5H10.75V9.25H16.5Z" fill="#788BA5" />
</svg>
);https://api.specifyapp.com/v2/parsers-engine-rpcContent-Type: application/json
Authorization: PAT <your-personal-access-token>type ParsersEngineRPCRequestBody = {
dataBox: ParsersEngineDataBox;
rules: Array<ParserRule>;
returnedKeys?: {
output?: boolean;
next?: boolean;
errorMessages?: boolean;
warningMessages?: boolean;
informationMessages?: boolean;
};
};type ParsersEngineResults = Array<{
pipelineName: string;
isFromRule: boolean;
status: "success" | "error";
output:
| {
type: "files";
files: Array<{
path: string;
content:
| { type: "text"; text: string }
| { type: "url"; url: string };
}>;
}
| {
type: "JSON";
json: unknown;
}
| {
type: "text";
text: string;
}
| {
type: "SDTF";
graph: SpecifyDesignTokenFormat;
}
| null;
next: ParsersEngineDataBox | undefined;
errorMessages: Array<{
type: "error";
content: string;
errorKey: string;
}>;
warningMessages: Array<{
type: "warning";
content: string;
errorKey: string;
}>;
informationMessages: Array<{
type: "information";
content: string;
}>;
}>;curl -X POST 'https://api.specifyapp.com/v2/parsers-engine-rpc' \
--header 'Authorization: PAT <YOUR-PERSONAL-ACCESS-TOKEN>' \
--header 'Content-Type: application/json' \
--data '{
"dataBox": {
"type": "repository",
"owner": "@acme-inc",
"name": "all-design-data"
},
"rules": [
{
"name": "HTTP Extract",
"parsers": [
{
"name": "to-sdtf",
"output": {
"type": "file",
"filePath": "tokens.json"
}
}
]
}
]
}'{
"assets": {
"image": {
"$type": "bitmap",
"$value": {
"1x": {
"url": "<url-of-your-bitmap-file>",
"format": "png",
"width": 623,
"height": 415,
"variationLabel": null
},
"2x": {
"url": "<url-of-your-bitmap-file>",
"format": "png",
"width": 1246,
"height": 830,
"variationLabel": null
}
}
}
}
}{
"version": "2",
"repository": "@organization/repository",
// Only use the personalAccessToken when working with the CLI
"personalAccessToken": "<your-personal-access-token>",
"rules": [
{
"name": "Generate images",
"parsers": [
{
"name": "to-bitmap-file",
"output": {
"type": "directory",
"directoryPath": "public"
}
}
]
}
]
}{
"version": "2",
"repository": "@organization/repository",
// Only use the personalAccessToken when working with the CLI
"personalAccessToken": "<your-personal-access-token>",
"rules": [
{
"name": "Generate images",
"parsers": [
{
"name": "to-file",
"options": {
"filenameTemplate": "{{name}}{{extension}}"
},
"output": {
"type": "directory",
"directoryPath": "public"
}
}
]
}
]
}{
"version": "2",
"head": "specifyrc-json",
"base": "main",
"repository": "@organization/repository",
"rules": [
{
"name": "Generate tokens in JSON",
"parsers": [
{
"name": "to-sdtf",
"output": {
"type": "file",
"filePath": "output/tokens.json"
}
}
]
}
]
}{
"version": "2",
"head": "specifyrc-json",
"base": "main",
"repository": "@organization/repository",
"rules": [
{
"name": "Generate tokens in JSON",
"parsers": [
{
"name": "to-sdtf",
"output": {
"type": "file",
"filePath": "output/tokens.json"
}
}
]
}
]
}readonly engine: SDTFEngine;readonly repository: {
readonly id: string;
readonly name: string;
readonly version: number;
readonly createdAt: string;
readonly updatedAt: string;
};getJSONTokenTree(): SpecifyDesignTokenFormat;clone(): SDTFClient;pick(path: Array<string>): this;query(query: SDTFQuery, dedupeFn?: MergeDedupeFn): SDTFClient;renameNode(options: {
atPath: Array<string>;
name: string;
type?: 'group' | 'collection' | 'token';
}): this;sdtf.renameNode({ atPath: ['my', 'group'], name: 'newName' })update(...updaters: Array<Updater>): this;withQuery(query: SDTFQuery): {
update: (...updaters: Array<Updater>) => SDTFClient;
};resolveAliases(): this;remove(query: SDTFQuery): this;reset(): this;executeEngine(fn: (engine: SDTFEngine) => void): this;forEachTokenState(fn: (tokenState: TokenState, engine: SDTFEngine) => void): this;mapTokenStates<T>(fn: (tokenState: TokenState, engine: SDTFEngine) => T): Array<T>;getTokenState(path: Array<string>): TokenState | undefined;getAllTokenStates(): Array<TokenState>;forEachCollectionState(fn: (collectionState: CollectionState, engine: SDTFEngine) => void): this;mapCollectionStates<T>(fn: (collectionState: CollectionState, engine: SDTFEngine) => T): Array<T>;getCollectionState(path: Array<string>): CollectionState | undefined;getAllCollectionStates(): Array<CollectionState>;forEachGroupState(fn: (groupState: GroupState, engine: SDTFEngine) => void): this;mapGroupStates<T>(fn: (groupState: GroupState, engine: SDTFEngine) => T): Array<T>;getGroupState(path: Array<string>): GroupState | undefined;getAllGroupStates(): Array<GroupState>;forEachQueryResult(query: SDTFQuery, fn: (treeNodeState: SDTFNodeState, engine: SDTFEngine, queryResult: QueryResult) => void): this;mapQueryResults<T>(query: SDTFQuery, fn: (treeNodeState: SDTFNodeState, engine: SDTFEngine, queryResult: QueryResult) => T): T[];createParsersPipelines(
...parsers: Array<ParserFunction<SDTFEngineDataBox>>
): () => Promise<ParsersEngineResults>;createParsersPipelinesFromRules(
...parsers: Array<BuiltInGenerationParserRule>
): () => Promise<ParsersEngineResults>;sdtfEngine.query.[method]function getTokenState(
path: Array<string>
):
| { status: "resolved"; tokenState: TokenState<Type> }
| { status: "unresolvable"; reason: "DOES_NOT_EXIST" };function getGroupState(
path: Array<string>
):
| { status: "resolved"; groupState: GroupState }
| { status: "unresolvable"; reason: "DOES_NOT_EXIST" };function getCollectionState(
path: Array<string>
):
| { status: 'resolved'; collectionState: CollectionState }
| { status: 'unresolvable'; reason: 'DOES_NOT_EXIST' };function getNearestCollectionState(
path: Array<string>
): | { status: 'resolved'; collectionState: CollectionState }
| { status: 'unresolvable'; reason: 'DOES_NOT_EXIST' };function getAllTokenStates(): Array<TokenState>;function getAllGroupStates(): Array<GroupState>;function getAllCollectionStates(): Array<CollectionState>;function getAllNodeStates(): Array<TokenState | GroupState | CollectionState>;function getTokenChildrenOf(path: Array<string>): Array<TokenState>;function getGroupChildrenOf(path: Array<string>): Array<GroupState>;function getCollectionChildrenOf(path: Array<string>): Array<CollectionState>;function getChildrenOf(path: Array<string>, depth: number): Array<TokenState | GroupState | CollectionState>;function getParentsOf(path: Array<string>, depth: number): Array<TokenState | GroupState | CollectionState>;function getGroupChildren(path: Array<string>): Array<GroupState>;function getTokenChildren(path: Array<string>): Array<TokenState>;function getCollectionChildren(path: Array<string>): Array<CollectionState>;function renderJSONTree(renderOptions: RenderOptions): JSON;function getAliasReference(
from: AliasReferenceCoordinates
): Result<AliasReference, SDTFError>;function getAllAliasReferences(): Array<AliasReference>;function getAliasReferencesTo(
to: Partial<AliasReferenceCoordinates>,
options: AliasReferenceResolvabilityOptions
): Array<AliasReference>;function getAliasReferencesFrom(
from: Partial<AliasReferenceCoordinates>,
options: AliasReferenceResolvabilityOptions
): Array<AliasReference>;function getStatefulAliasReference(
from: AliasReferenceCoordinates
): Result<StatefulAliasReference, SDTFError>;function getStatefulAliasReferencesTo(
to: Partial<AliasReferenceCoordinates>,
options: AliasReferenceResolvabilityOptions
): Array<StatefulAliasReference>;function getStatefulAliasReferencesFrom(
from: Partial<AliasReferenceCoordinates>,
options: AliasReferenceResolvabilityOptions
): Array<StatefulAliasReference>;{
"colors": {
{
"icons": {
<svg xmlns="http://www.w3.org/2000/svg" width="20" height="20" viewBox="0 0 20 20" fill="none">
<path d="M9.25 9.25V3.5H4C3.72386 3.5 3.5 3.72386 3.5 4V9.25H9.25ZM9.25 10.75H3.5V16C3.5 16.2761 3.72386 16.5 4 16.5H9.25V10.75ZM10.75 16.5H16C16.2761 16.5 16.5 16.2761 16.5 16V10.75H10.75V16.5ZM4 18C2.89543 18 2 17.1046 2 16V4C2 2.89543 2.89543 2 4 2H10H16C17.1046 2 18 2.89543 18 4V10V16C18 17.1046 17.1046 18 16 18H4ZM16.5 9.25V4C16.5 3.72386 16.2761 3.5 16 3.5H10.75V9.25H16.5Z" fill="#788BA5" />
</svg>{
"version": "2",
{
"version": "2",
Methods for locally mutating the token tree.
addTokenrenameTokenupdateTokenDescriptionupdateTokenExtensionsupdateTokenValueupdateTokenModeValuerenameTokenModecreateTokenModeValuedeleteTokenModeValuedeleteTokenmoveTokenaddCollectionrenameCollectionupdateCollectionDescriptionupdateCollectionExtensionsrenameCollectionModetruncateCollectiondeleteCollectiondeleteCollectionModemoveCollectionaddGrouprenameGroupupdateGroupDescriptionupdateGroupExtensionstruncateGroupdeleteGroupmoveGroupThis template helps you generate your design tokens as a Tailwind theme.
This template helps you generate your design tokens as a React Native theme and icons as JSX components
{
"version": "2",
"repository": "@organization/repository",
// Only use the personalAccessToken when working with the CLI
"personalAccessToken": "<your-personal-access-token>",
"rules": [
{
"name": "Only get tokens from the mode named 'light' and gererate tokens in CSS",
"parsers": [
{
"name": "select-modes",
"options": {
"modes": ["light"]
}
},
{
"name": "to-css-custom-properties",
"options": {
"selectorTemplate": "[data-theme=\"{{mode}}\"]"
},
"output": {
"type": "file",
"filePath": "public/css-custom-properties.css"
}
}
]
}
]
}[data-theme="light"] {
--danger-dangerToken: rgb(209, 204, 204);
--info-infoToken: rgb(219, 234, 254);
}interface parser {
name: 'select-modes';
options: {
modes: string[];
};
}<svg viewBox="0 0 20 20" fill="none" xmlns="http://www.w3.org/2000/svg">
<path d="M9.25 9.25V3.5H4C3.72386 3.5 3.5 3.72386 3.5 4V9.25H9.25ZM9.25 10.75H3.5V16C3.5 16.2761 3.72386 16.5 4 16.5H9.25V10.75ZM10.75 16.5H16C16.2761 16.5 16.5 16.2761 16.5 16V10.75H10.75V16.5ZM4 18C2.89543 18 2 17.1046 2 16V4C2 2.89543 2.89543 2 4 2H10H16C17.1046 2 18 2.89543 18 4V10V16C18 17.1046 17.1046 18 16 18H4ZM16.5 9.25V4C16.5 3.72386 16.2761 3.5 16 3.5H10.75V9.25H16.5Z" fill="currentColor" />
</svg>interface Parser {
name: "svgo";
output: {
type: "directory";
directoryPath: string;
};
options?: {
// https://github.com/svg/svgo/blob/main/lib/svgo.d.ts#L29-L49
svgo?: Config;
};
}interface parser {
name: 'prefix-by';
options: ({
all: string
} |
{
group?: string;
collection?: string;
token?: string;
}) & { applyTo?: SDTFQuery }
}interface parser {
name: "to-json-list";
output:
| {
type: "file";
filePath: string;
}
| { type: "JSON" };
options?: {
stringPathSeparator?: string;
};
}
interface parser {
name: 'suffix-by';
options: ({
all: string
} |
{
group?: string;
collection?: string;
token?: string;
}) & { applyTo?: SDTFQuery }
}interface parser {
name: 'to-scss-map';
output: {
type: 'directory';
directoryPath: string;
};
options?: {
tokenNameTemplate?: string;
};
}sdtfEngine.mutation.[method]function addToken(param:{
parentPath: Array<string>,
name: string,
tokenProperties: {
$type: string;
$value: unknown;
$description?: string;
$extensions?: Record<string, unknown>;
},
}): void;interface parser {
name: 'svg-to-jsx';
output: {
type: 'directory';
directoryPath: string;
};
options?:{
reactVersion?: string;
tsx?: boolean;
filePrefix?: string;
fileSuffix?: string;
exportDefault?: boolean;
tokenNameTemplate?: string;
}
}{
"where": {
"token": ".*",
"withTypes": { "include": ["color"] },
"select": true
}
}{
"colors": {
"$collection": {
"$modes": [
"light",
"dark"
]
},
"Core": {
"blue-100": {
"$type": "color",
"$value": {
"dark": {
"red": 229,
"blue": 29,
"alpha": 1,
"green": 29,
"model": "rgb"
},
"light": {
"red": 255,
"blue": 255,
"alpha": 1,
"green": 255,
"model": "rgb"
}
},
"$description": "token 1 aliased with n modes within collection within n groups"
},
"blue-700": {
"$type": "color",
"$value": {
"dark": {
"red": 229,
"blue": 0,
"alpha": 1,
"green": 0,
"model": "rgb"
},
"light": {
"red": 255,
"blue": 255,
"alpha": 1,
"green": 200,
"model": "rgb"
}
},
"$description": "token 2 aliased with n modes within collection within n groups"
}
},
"semantic": {
"background": {
"button": {
"primary": {
"hover": {
"$type": "color",
"$value": {
"dark": {
"$mode": "dark",
"$alias": "colors.Core.blue-100"
},
"light": {
"$mode": "light",
"$alias": "colors.Core.blue-700"
}
},
"$description": "alias token with n modes within collection within n groups"
}
}
}
}
}
}
}rules are where you provide parsers and compatible options{
"version": "2",
"repository": "@organization/repository",
// Only use the personalAccessToken when working with the CLI
"personalAccessToken": "<your-personal-access-token>",
"rules": [
{
"name": "Generate tokens as a Tailwind theme",
"parsers": [
{
"name": "to-tailwind",
"output": {
"type": "file",
"filePath": "theme.js"
}
}
]
},
{
"name": "Optimize and transform vectors with svgo + Generate JSX components",
"parsers": [
{
"name": "svgo",
"options": {
"svgo": {
"plugins": [
{
"name": "removeDimensions"
},
{
"name": "convertColors",
"params": {
"currentColor": true
}
}
]
}
}
},
{
"name": "svg-to-jsx",
"output": {
"type": "directory",
"directoryPath": "output/assets"
}
}
]
}
]
}{
"version": "2",
"repository": "@organization/repository",
"head": "specifyrc-json",
"base": "main",
"rules": [
{
"name": "Generate tokens for Flutter",
"parsers": [
{
"name": "to-flutter",
"output": {
"type": "file",
"filePath": "public/tokens.dart"
}
}
]
},
{
"name": "Optimize and generate icons as SVG files",
"parsers": [
{
"name": "svgo",
"output": {
"type": "directory",
"directoryPath": "public/vectors"
}
}
]
}
]
}type FlattenNode = (
| {
kind: 'group';
}
| {
kind: 'collection';
modes: Array<string>;
}
| {
kind: 'token';
type: string;
modeValues: Array<{
mode: string;
value: unknown;
}>;
}
) & {
path: Array<string>;
stringPath: string;
name: string;
description?: string;
extensions?: unknown;
};
type ParserOutput = Array<FlattenNode>{
"aCollection": {
"$collection": {
"$modes": ["light", "dark"]
},
"blue": {
"$type": "color",
"$value": {
"light": {
"model": "hex",
"hex": "#0000CC",
"alpha": 1
},
"dark": {
"model": "hex",
"hex": "#0000FF",
"alpha": 1
}
}
}
},
"aGroup": {
"aDimension": {
"$type": "dimension",
"$value": {
"default": {
"unit": "px",
"value": 16
}
}
}
}
}
{
"version": "2",
"repository": "@organization/repository",
// Only use the personalAccessToken when working with the CLI
"personalAccessToken": "<your-personal-access-token>",
"rules": [
{
"name": "To JSON",
"parsers": [
{
"name": "to-json-list",
"output": {
"type": "file",
"filePath": "tokens.json"
}
}
]
}
]
}[
{
"path": [
"aCollection"
],
"stringPath": "aCollection",
"name": "aCollection",
"kind": "collection",
"modes": [
"light",
"dark"
]
},
{
"path": [
"aCollection",
"blue"
],
"stringPath": "aCollection.blue",
"name": "blue",
"kind": "token",
"type": "color",
"modeValues": [
{
"mode": "dark",
"value": {
"model": "hex",
"hex": "#0000FF",
"alpha": 1
}
},
{
"mode": "light",
"value": {
"model": "hex",
"hex": "#0000CC",
"alpha": 1
}
}
]
},
{
"path": [
"aGroup"
],
"stringPath": "aGroup",
"name": "aGroup",
"kind": "group"
},
{
"path": [
"aGroup",
"aDimension"
],
"stringPath": "aGroup.aDimension",
"name": "aDimension",
"kind": "token",
"type": "dimension",
"modeValues": [
{
"mode": "default",
"value": {
"value": 16,
"unit": "px"
}
}
]
}
]my-app/
src/
components/
...
index.ts
public/
package.json
...my-app/
specify/
...
src/
components/
...
index.ts
public/
package.json
...cd ./specifynpm init
npm install -D @specifyapp/sdk dotenv typescriptyarn init
npm add -D @specifyapp/sdk dotenv typescriptpnpm init
pnpm add -D @specifyapp/sdk dotenv typescript{
"name": "specify-design-tokens-extractor",
"private": true,
"version": "1.0.0",
"description": "Extract design tokens from Specify repositories",
"type": "module",
"scripts": {
"build": "tsc",
"extract": "tsc && node ./extract.js"
}
}{
"name": "specify-design-tokens-extractor",
"private": true,
"version": "1.0.0",
"description": "Extract design tokens from Specify repositories",
"type": "module",
"scripts": {
"extract": "node ./extract.js"
}
}{
"compilerOptions": {
"strict": true,
"target": "es2022",
"lib": ["es2022"],
"moduleDetection": "force",
"module": "NodeNext",
"sourceMap": true,
"skipLibCheck": true,
"outDir": ".",
"rootDir": "./"
},
"include": ["./extract.ts"],
"exclude": ["node_modules"]
}SPECIFY_PERSONAL_ACCESS_TOKEN=YOUR-PERSONAL-ACCESS-TOKENimport { config } from "dotenv";
import { createSpecifyClient, updaters, parsers } from "@specifyapp/sdk";
// Load Personal Access Token from .env file
const { parsed } = config({ path: ".env" });// Initialize Specify Client
const specifyClient = createSpecifyClient();
await specifyClient.authenticate(parsed?.SPECIFY_PERSONAL_ACCESS_TOKEN || "");
console.log(`User authenticated: ${specifyClient.whoAmI()?.email}`);npm run extractyarn extractpnpm run extractUser authenticated: [email protected]const repositories = await specifyClient.getRepositories();
console.log(repositories); // [{ id: '...', name: '...' }, ...]{
"where": {
"collection": "^Colors$",
"andWhere": {
"group": "^components$",
"andWhere": {
"token": ".*",
"withTypes": { "include": ["color"] },
"select": {
"token": true,
"parents": true
}
}
}
}
}type SDTFQuery = { where: Where | Array<Where> }type WhereToken = {
token:
| string // regex compatible
| {
name?: string; // regex compatible
description?: string; // regex compatible
};
select:
| true
| {
token?: boolean;
parents?:
| true
| {
groups?: true;
collections?: true;
};
};
withTypes?: {
include?: Array<TokenTypeName>;
exclude?: Array<TokenTypeName>;
};
withModes?: {
include?: Array<string>;
exclude?: Array<string>;
}
};type WhereGroup = {
group:
| string // regex compatible
| {
name?: string; // regex compatible
description?: string; // regex compatible
};
select:
| true
| {
group?: boolean;
parents?:
| true
| {
groups?: true;
collections?: true;
};
children:
| true
| {
groups?: true;
collections?: true;
tokens?: true;
};
};
};type WhereCollection = {
collection:
| string // regex compatible
| {
name?: string; // regex compatible
description?: string; // regex compatible
};
select:
| true
| {
collection?: boolean;
parents?:
| true
| {
groups?: true;
};
children:
| true
| {
groups?: true;
tokens?: true;
};
};
withModes?: {
include?: Array<string>;
exclude?: Array<string>;
}
};{
"where": {
"collection": "^colors$",
"andWhere": {
"group": "^base",
"andWhere": {
"token": ".*",
"withTypes": { "include": ["color"] },
"select": {
"token": true,
"parents": true
}
}
}
}
}function renameToken(param: { atPath: Array<string>; name: string }): void;function updateTokenDescription(param: {
atPath: Array<string>;
description: string;
}): void;function updateTokenExtensions(param: {
atPath: Array<string>;
extensions: treeNodeExtensionsSchema;
}): void;function updateTokenValue(param:{
atPath: Array<string>,
// We cannot know with type of the value since no type is enforced
value: unknown,
}): void;function updateTokenModeValue(param:{
mode: string,
// We cannot know with type of the value since no type is enforced
value: unknown,
}): void;function renameTokenMode(param: {
atPath: Array<string>;
fromMode: string;
toMode: string;
}): void;function createTokenModeValue(param:{
atPath: Array<string>,
mode: string,
// We cannot know with type of the value since no type is enforced
value: unknown,
}): void;function deleteTokenModeValue(param: {
atPath: Array<string>;
mode: string;
}): void;function deleteToken(param: { atPath: Array<string> }): void;function moveToken(param: {
atPath: Array<string>;
toPath: Array<string>;
}): void;function addCollection(param: {
parentPath: Array<string>;
name: string;
collectionProperties: {
$collection: {$modes: Array<string>};
$description?: string;
$extensions?: Record<string, unknown>;
};
}): void;function renameCollection(param: {
atPath: Array<string>;
name: string;
}): void;function updateCollectionDescription(param: {
atPath: Array<string>;
description: string;
}): void;function updateCollectionExtensions(param: {
atPath: Array<string>;
extensions: treeNodeExtensionsSchema;
}): void;function renameCollectionMode(param: {
atPath: Array<string>;
fromMode: string;
toMode: string;
}): void;function truncateCollection(param: { atPath: Array<string> }): void;function deleteCollection(param: { atPath: Array<string> }): void;function deleteCollectionMode(param: {
atPath: Array<string>;
mode: string;
}): void;function moveCollection(param: {
atPath: Array<string>;
toPath: Array<string>;
}): void;function addGroup(param: {
parentPath: Array<string>;
name: string;
groupProperties: specifyGroupPropertiesSchema;
}): void;function renameGroup(param: { atPath: Array<string>; name: string }): void;function updateGroupDescription(param: {
atPath: Array<string>;
description: string;
}): void;function updateGroupExtensions(param: {
atPath: Array<string>;
extensions: treeNodeExtensionsSchema;
}): void;function truncateGroup(param: { atPath: Array<string> }): void;function deleteGroup(param: { atPath: Array<string> }): void;function moveGroup(param: {
atPath: Array<string>;
toPath: Array<string>;
}): void;17.0.0{
"icons": {
"menu": {
"$type": "vector",
"$value": {
"default": {
"variationLabel": null,
"format": "svg",
"url": "<url-of-your-svg-file>"
}
}
}
}
}{
"version": "2",
"repository": "@organization/repository",
"personalAccessToken": "<your-personal-access-token>",
"rules": [
{
"name": "Generate JSX components",
"parsers": [
{
"name": "svg-to-jsx",
"output": {
"type": "directory",
"directoryPath": "output/assets"
}
}
]
}
]
}export default () => (
<svg width="20" height="20" viewBox="0 0 20 20" fill="none" xmlns="http://www.w3.org/2000/svg">
<path d="M9.25 9.25V3.5H4C3.72386 3.5 3.5 3.72386 3.5 4V9.25H9.25ZM9.25 10.75H3.5V16C3.5 16.2761 3.72386 16.5 4 16.5H9.25V10.75ZM10.75 16.5H16C16.2761 16.5 16.5 16.2761 16.5 16V10.75H10.75V16.5ZM4 18C2.89543 18 2 17.1046 2 16V4C2 2.89543 2.89543 2 4 2H10H16C17.1046 2 18 2.89543 18 4V10V16C18 17.1046 17.1046 18 16 18H4ZM16.5 9.25V4C16.5 3.72386 16.2761 3.5 16 3.5H10.75V9.25H16.5Z" fill="#788BA5" />
</svg>
);{
"version": "2",
"repository": "@organization/repository",
// Only use the personalAccessToken when working with the CLI
"personalAccessToken": "<your-personal-access-token>",
"rules": [
{
"name": "To JSON",
"parsers": [
{
"name": "to-json",
"output": {
"type": "file",
"filePath": "tokens.json"
}
}
]
}
]
}{
"colors": {
"Core": {
"blue-100": {
"dark": {
"model": "rgb",
"red": 229,
"green": 29,
"blue": 29,
"alpha": 1
},
"light": {
"model": "rgb",
"red": 255,
"green": 255,
"blue": 255,
"alpha": 1
}
},
"blue-700": {
"dark": {
"model": "rgb",
"red": 229,
"green": 0,
"blue": 0,
"alpha": 1
},
"light": {
"model": "rgb",
"red": 255,
"green": 200,
"blue": 255,
"alpha": 1
}
}
},
"semantic": {
"background": {
"button": {
"primary": {
"hover": {
"dark": {
"model": "rgb",
"red": 229,
"green": 29,
"blue": 29,
"alpha": 1
},
"light": {
"model": "rgb",
"red": 255,
"green": 200,
"blue": 255,
"alpha": 1
}
}
}
}
}
}
}
}interface parser {
name: 'to-json';
output: {
type: 'file';
filePath: string;
};
options?: {
output?: 'raw' | 'css';
};
}{
"icons": {
"menu": {
"$type": "vector",
"$value": {
"default": {
"variationLabel": null,
"format": "svg",
"url": "<url-of-your-svg-file>"
}
}
}
}
}{
"version": "2",
"repository": "@organization/repository",
// Only use the personalAccessToken when working with the CLI
"personalAccessToken": "<your-personal-access-token>",
"rules": [
{
"name": "Generate SVG files",
"parsers": [
{
"name": "to-svg-file",
"output": {
"type": "directory",
"directoryPath": "output/assets"
}
}
]
}
]
}<svg width="20" height="20" viewBox="0 0 20 20" xmlns="http://www.w3.org/2000/svg">
<path d="M9.25 9.25V3.5H4C3.72386 3.5 3.5 3.72386 3.5 4V9.25H9.25ZM9.25 10.75H3.5V16C3.5 16.2761 3.72386 16.5 4 16.5H9.25V10.75ZM10.75 16.5H16C16.2761 16.5 16.5 16.2761 16.5 16V10.75H10.75V16.5ZM4 18C2.89543 18 2 17.1046 2 16V4C2 2.89543 2.89543 2 4 2H10H16C17.1046 2 18 2.89543 18 4V10V16C18 17.1046 17.1046 18 16 18H4ZM16.5 9.25V4C16.5 3.72386 16.2761 3.5 16 3.5H10.75V9.25H16.5Z" />
</svg>{
"asset": {
"$collection": {
"$modes": [
"light",
"dark"
]
},
"icons": {
"menu": {
"$type": "vector",
"$value": {
"light": {
"variationLabel": null,
"format": "svg",
"url": "<url-of-your-svg-file>"
},
"dark": {
"variationLabel": null,
"format": "svg",
"url": "<url-of-your-svg-file>"
}
}
}
}
}
}{
"version": "2",
"repository": "@organization/repository",
// Only use the personalAccessToken when working with the CLI
"personalAccessToken": "<your-personal-access-token>",
"rules": [
{
"name": "Generate SVG files",
"parsers": [
{
"name": "to-svg-file",
"output": {
"type": "directory",
"directoryPath": "output/assets"
}
}
]
}
]
}<svg width="20" height="20" viewBox="0 0 20 20" fill="none" xmlns="http://www.w3.org/2000/svg">
<path d="M9.25 9.25V3.5H4C3.72386 3.5 3.5 3.72386 3.5 4V9.25H9.25ZM9.25 10.75H3.5V16C3.5 16.2761 3.72386 16.5 4 16.5H9.25V10.75ZM10.75 16.5H16C16.2761 16.5 16.5 16.2761 16.5 16V10.75H10.75V16.5ZM4 18C2.89543 18 2 17.1046 2 16V4C2 2.89543 2.89543 2 4 2H10H16C17.1046 2 18 2.89543 18 4V10V16C18 17.1046 17.1046 18 16 18H4ZM16.5 9.25V4C16.5 3.72386 16.2761 3.5 16 3.5H10.75V9.25H16.5Z" fill="#788BA5" />
</svg><svg width="20" height="20" viewBox="0 0 20 20" fill="none" xmlns="http://www.w3.org/2000/svg">
<path d="M9.25 9.25V3.5H4C3.72386 3.5 3.5 3.72386 3.5 4V9.25H9.25ZM9.25 10.75H3.5V16C3.5 16.2761 3.72386 16.5 4 16.5H9.25V10.75ZM10.75 16.5H16C16.2761 16.5 16.5 16.2761 16.5 16V10.75H10.75V16.5ZM4 18C2.89543 18 2 17.1046 2 16V4C2 2.89543 2.89543 2 4 2H10H16C17.1046 2 18 2.89543 18 4V10V16C18 17.1046 17.1046 18 16 18H4ZM16.5 9.25V4C16.5 3.72386 16.2761 3.5 16 3.5H10.75V9.25H16.5Z" fill="#555AAA" />
</svg>interface parser {
name: 'to-svg-file';
options: {
filenameTemplate: string;
};
output: {
type: 'directory';
directoryPath: string;
};
}{
"version": "2",
"head": "specifyrc-json",
"base": "main",
"repository": "@organization/repository",
"rules": [
{
"name": "Generate tokens as a Tailwind theme",
"parsers": [
{
"name": "to-tailwind",
"output": {
"type": "file",
"filePath": "theme.js"
}
}
]
},
{
"name": "Optimize and transform vectors with svgo + Generate JSX components",
"parsers": [
{
"name": "svgo",
"options": {
"svgo": {
"plugins": [
{
"name": "removeDimensions"
},
{
"name": "convertColors",
"params": {
"currentColor": true
}
}
]
}
}
},
{
"name": "svg-to-jsx",
"output": {
"type": "directory",
"directoryPath": "output/assets"
}
}
]
}
]
}{
"colors": {
{
"colors": {
"$collection": { "$modes": ["light", "dark
"core": {
"blue-100": {
"$type": "color",
"$description": "token 1 aliased with n modes within collection within n groups",
"$value": {
"light": {
"red": 219,
"blue": 254,
"alpha": 1,
"green": 236,
"model": "rgb"
},
"dark": {
"red": 41,
"blue": 67,
"alpha": 1,
"green": 52,
"model": "rgb"
}
}
},
"blue-700": {
"$type": "color",
"$description": "token 2 aliased with n modes within collection within n groups",
"$value": {
"light": {
"red": 17,
"blue": 249,
"alpha": 1,
"green": 125,
"model": "rgb"
},
"dark": {
"red": 96,
"blue": 250,
"alpha": 1,
"green": 168,
"model": "rgb"
}
}
}
},
"semantic": {
"background": {
"button": {
"primary": {
"hover": {
"$type": "color",
"$description": "alias token with n modes within collection within n groups",
"$value": {
"dark": {
"$mode": "dark",
"$alias": "colors.core.blue-100"
},
"light": {
"$mode": "light",
"$alias": "colors.core.blue-700"
}
}
}
}
}
}
}
}
}Learn how to add font files to your Specify repositories once you've synced text styles.
This parser helps you pull design tokens as JavaScript objects for all token types and their respective helper functions.
This parser helps you get your design tokens as a SDTF graph in JSON.
{
"spacing": {
"1": {
"$type": "dimension",
"$value": {
"default": {
"value": 4,
"unit": "px"
}
}
}
},
"colors": {
"black": {
"$type": "color",
"$value": {
"default": {
"model": "hex",
"hex": "#000000",
"alpha": 1
}
}
}
}
}{
"version": "2",
"repository": "@organization/repository",
// Only use the personalAccessToken when working with the CLI
"personalAccessToken": "<your-personal-access-token>",
"rules": [
{
"name": "Prefix color tokens",
"parsers": [
{
"name": "prefix-by",
"options": {
"token": "ds-",
"applyTo": {
"where": {
"token": ".*",
"withTypes": {
"include": [
"color"
]
},
"select": {
"parents": true
}
}
}
}
},
{
"name": "to-sdtf",
"output": {
"type": "file",
"filePath": "tokens.json"
}
}
]
}
]
}{
"colors": {
"ds-black": {
"$type": "color",
"$value": {
"default": {
"model": "hex",
"hex": "#000000",
"alpha": 1
}
}
}
},
"spacing": {
"1": {
"$type": "dimension",
"$value": {
"default": {
"value": 4,
"unit": "px"
}
}
}
}
}{
"spacing": {
"1": {
"$type": "dimension",
"$value": {
"default": {
"value": 4,
"unit": "px"
}
}
}
},
"colors": {
"black": {
"$type": "color",
"$value": {
"default": {
"model": "hex",
"hex": "#000000",
"alpha": 1
}
}
}
}
}{
"version": "2",
"repository": "@organization/repository",
// Only use the personalAccessToken when working with the CLI
"personalAccessToken": "<your-personal-access-token>",
"rules": [
{
"name": "Prefix color tokens",
"parsers": [
{
"name": "suffix-by",
"options": {
"token": "-color",
"applyTo": {
"where": {
"token": ".*",
"withTypes": {
"include": [
"color"
]
},
"select": {
"parents": true
}
}
}
}
},
{
"name": "to-sdtf",
"output": {
"type": "file",
"filePath": "tokens.json"
}
}
]
}
]
}{
"colors": {
"black-color": {
"$type": "color",
"$value": {
"default": {
"model": "hex",
"hex": "#000000",
"alpha": 1
}
}
}
},
"spacing": {
"1": {
"$type": "dimension",
"$value": {
"default": {
"value": 4,
"unit": "px"
}
}
}
}
}interface ConfigurationFileCommon {
version: '2';
repository: string; // @owner/repository
rules: Array<ParserRule>;
}interface CLIConfigurationFile extends ConfigurationFileCommon {
personalAccessToken?: string; // Can be set using the -p flag
}interface GitHubConfigurationFile extends ConfigurationFileCommon {
personalAccessToken: string; // Can be set over secret
}interface ParserRule {
name?: string;
parsers: Array<ParserConfiguration>;
};interface ParserConfiguration {
name: string; // parser name: to-json, to-tailwind...
output:
| { type: 'directory', directoryPath: string }
| { type: 'file', filePath: string };
options?: Record<string, any>; // depends on the selected parser
}type SDTFDataBox = {
type: "SDTF";
graph: SpecifyDesignTokenFormat;
metadata?:
| {
activeViewName: string | null;
views: Array<{
name: string;
query: SDTFQuery;
}>;
}
| undefined;
};type SDTFEngineDataBox = {
type: "SDTF Engine";
engine: SDTFEngine;
}type SpecifyRepositoryDataBox = {
type: "repository";
owner: string;
name: string;
}type JSONDataBox = {
type: "JSON";
json: string | number | boolean | unknown[] | Record<string, unknown> | null;
}type VectorDataBox = {
type: 'vector';
format: 'svg' | 'pdf';
provider: 'external' | 'Specify';
extension: {
vector?: string, // The text representation of the SVG file
},
}type BitmapDataBox = {
type: 'bitmap';
format: 'png' | 'wp2' | 'avif' | 'webp' | 'jpg' | 'jxl';
provider: 'external' | 'Specify';
extension: {
bitmap?: Array<number>, // The array buffer representation of the bitmap file
},
}type AssetDataBox = {
type: 'asset';
format: 'png' | 'wp2' | 'avif' | 'webp' | 'jpg' | 'jxl' | 'svg' | 'pdf' | 'ttf' | 'woff' | 'woff2' | 'otf' | 'eot';
provider: 'external' | 'Specify' | 'Google Fonts' | 'Adobe Fonts';
}type FileOutput = {
type: 'file';
filePath: string;
}"parsers": [
{
"name": "to-css-custom-properties",
"output": {
"type": "file",
"filePath": "style.css"
}
}
]type DirectoryOutput = {
type: 'directory';
directoryPath: string;
}"parsers": [
{
"name": "to-svg-file",
"output": {
"type": "directory",
"directoryPath": "./public/assets"
}
}
]interface parser {
name: 'register-view';
options: {
name: string;
query: SDTFQuery;
};
}{
"version": "2",
"repository": "@organization/repository",
"personalAccessToken": "<your-personal-access-token>",
"rules": [
{
"name": "Generate tokens",
"parsers": [
{
"name": "to-scss-map",
"output": {
"type": "directory",
"directoryPath": "public"
},
"options": {}
}
]
}
]
}@use "sass:map";
$color: (
colors-core-blue-100-dark: rgb(41, 52, 67),
colors-core-blue-100-light: rgb(219, 236, 254),
colors-core-blue-700-dark: rgb(96, 168, 250),
colors-core-blue-700-light: rgb(17, 125, 249),
colors-semantic-background-button-primary-hover-dark: rgb(41, 52, 67),
colors-semantic-background-button-primary-hover-light: rgb(17, 125, 249),
);
@mixin get-color($levels...) {
$fetched: $color;
@each $level in $levels {
@if map-has-key($fetched, $level) {
$fetched: map-get($fetched, $level);
} @else {
@error "There is no `#{$level}` in the `#{$color}` map";
}
}
@if type-of($fetched) != map {
@error "Non usable value. Got `#{$color}`";
}
@each $prop, $value in $fetched {
#{$prop}: $value;
}
}interface parser {
name: 'to-flutter';
output: {
type: 'file';
filePath: string;
};
options?:{
tokenNameTemplate?: string;
}
}interface parser {
name: 'to-swift';
output: {
type: 'file';
filePath: string;
};
options?: {
tokenNameTemplate?: string;
scopeName?: string;
}
}interface parser {
name: 'to-style-dictionary';
output: {
type: 'directory';
directoryPath: string;
};
}interface parser {
name: 'to-css-font-import';
output: {
type: 'file';
filePath: string;
};
options?: {
formats?: Array<'woff' | 'woff2' | 'ttf' | 'otf' | 'eot'>;
fontsPath?: string;
includeFontWeight?: boolean;
genericFamily?: string;
fontDisplay?: 'auto' | 'block' | 'swap' | 'fallback' | 'optional';
};
}{
"colors": {
"$collection": {
"$modes": [
"light",
"dark"
]
},
"aliases": {
"border": {
"active": {
"$type": "color",
"$value": {
"dark": {
"$alias": "colors.core.label.blue-base",
"$mode": "dark"
},
"light": {
"$alias": "colors.core.label.blue-base",
"$mode": "light"
}
}
}
}
},
"core": {
"label": {
"blue-base": {
"$type": "color",
"$value": {
"dark": {
"model": "rgb",
"red": 96,
"green": 168,
"blue": 250,
"alpha": 1
},
"light": {
"model": "rgb",
"red": 17,
"green": 125,
"blue": 249,
"alpha": 1
}
}
},
"blue-lighter": {
"$type": "color",
"$value": {
"dark": {
"model": "rgb",
"red": 41,
"green": 52,
"blue": 67,
"alpha": 1
},
"light": {
"model": "rgb",
"red": 219,
"green": 236,
"blue": 254,
"alpha": 1
}
}
}
}
}
},
"dimensions": {
"$collection": {
"$modes": [
"desktop",
"mobile"
]
},
"base": {
"dimension-01": {
"$type": "dimension",
"$value": {
"mobile": {
"value": 2,
"unit": "px"
},
"desktop": {
"value": 4,
"unit": "px"
}
}
},
"dimension-02": {
"$type": "dimension",
"$value": {
"mobile": {
"value": 4,
"unit": "px"
},
"desktop": {
"value": 8,
"unit": "px"
}
}
}
}
}
}{
"colors": {
"$collection": {
"$modes": [
"light",
"dark"
]
},
"Core": {
"blue-100": {
"$type": "color",
"$value": {
"dark": {
"red": 229,
"blue": 29,
"alpha": 1,
"green": 29,
"model": "rgb"
},
"light": {
"red": 255,
"blue": 255,
"alpha": 1,
"green": 255,
"model": "rgb"
}
},
"$description": "token 1 aliased with n modes within collection within n groups"
},
"blue-700": {
"$type": "color",
"$value": {
"dark": {
"red": 229,
"blue": 0,
"alpha": 1,
"green": 0,
"model": "rgb"
},
"light": {
"red": 255,
"blue": 255,
"alpha": 1,
"green": 200,
"model": "rgb"
}
},
"$description": "token 2 aliased with n modes within collection within n groups"
}
},
"semantic": {
"background": {
"button": {
"primary": {
"hover": {
"$type": "color",
"$value": {
"dark": {
"$mode": "dark",
"$alias": "colors.Core.blue-100"
},
"light": {
"$mode": "light",
"$alias": "colors.Core.blue-700"
}
},
"$description": "alias token with n modes within collection within n groups"
}
}
}
}
}
}
}{collectionName?}/{SDCategory}/{1stLevelGroupName?}{
"version": "2",
"repository": "@organization/repository",
// Only use the personalAccessToken when working with the CLI
"personalAccessToken": "<your-personal-access-token>",
"rules": [
{
"name": "Generate tokens as a React Native theme",
"parsers": [
{
"name": "convert-dimension",
"options": {
"toFormat": null
}
},
{
"name": "to-react-native",
"output": {
"type": "file",
"filePath": "theme.js"
}
}
]
},
{
"name": "Optimize and transform vectors with svgo + Generate JSX components",
"parsers": [
{
"name": "svgo",
"options": {
"svgo": {
"plugins": [
{
"name": "removeDimensions"
},
{
"name": "convertColors",
"params": {
"currentColor": true
}
}
]
}
}
},
{
"name": "svg-to-jsx",
"output": {
"type": "directory",
"directoryPath": "output/assets"
}
}
]
}
]
}Record<string, any>{
"version": "2",
"repository": "@organization/repository",
// Only use the personalAccessToken when working with the CLI
"personalAccessToken": "<your-personal-access-token>",
"rules": [
{
"name": "Only get tokens from a group named 'info' and gererate tokens in JSON",
"parsers": [
{
"name": "register-view",
"options": {
"name": "Info only",
"query": {
"where": {
"group": "info",
"select": {
"parents": true,
"children": true
}
}
}
}
},
{
"name": "to-css-custom-properties",
"options": {
"withSDTFView": "Info only"
},
"output": {
"type": "file",
"filePath": "tokens.css"
}
}
]
}
]
}:root[data-colors="light"] {
--info-infoToken: rgb(219, 234, 254);
}
:root[data-colors="dark"] {
--info-infoToken: rgb(219, 234, 254);
}{
"version": "2",
"repository": "@organization/repository",
// Only use the personalAccessToken when working with the CLI
"personalAccessToken": "<your-personal-access-token>",
"rules": [
{
"name": "To Flutter",
"parsers": [
{
"name": "to-flutter",
"output": {
"type": "file",
"filePath": "public/tokens.dart"
}
}
]
}
]
}// ignore_for_file: camel_case_types
import 'dart:core';
import 'package:flutter/painting.dart';
import 'package:flutter/animation.dart';
class Color_ {
static const colorsCoreLabelBlueBaseDark = Color.fromRGBO(96, 250, 168, 1.0);
static const colorsCoreLabelBlueBaseLight = Color.fromRGBO(17, 249, 125, 1.0);
static const colorsAliasesBorderActiveDark = Color.fromRGBO(96, 250, 168, 1.0);
static const colorsAliasesBorderActiveLight = Color.fromRGBO(17, 249, 125, 1.0);
static const colorsCoreLabelBlueLighterDark = Color.fromRGBO(41, 67, 52, 1.0);
static const colorsCoreLabelBlueLighterLight = Color.fromRGBO(219, 254, 236, 1.0);
}
class Dimension_ {
static const dimensionsBaseDimension_01Desktop = 4;
static const dimensionsBaseDimension_01Mobile = 2;
static const dimensionsBaseDimension_02Desktop = 8;
static const dimensionsBaseDimension_02Mobile = 4;
}{
"colors": {
"$collection": {
"$modes": [
"light",
"dark"
]
},
"aliases": {
"border": {
"active": {
"$type": "color",
"$value": {
"dark": {
"$alias": "colors.core.label.blue-base",
"$mode": "dark"
},
"light": {
"$alias": "colors.core.label.blue-base",
"$mode": "light"
}
}
}
}
},
"core": {
"label": {
"blue-base": {
"$type": "color",
"$value": {
"dark": {
"model": "rgb",
"red": 96,
"green": 168,
"blue": 250,
"alpha": 1
},
"light": {
"model": "rgb",
"red": 17,
"green": 125,
"blue": 249,
"alpha": 1
}
}
},
"blue-lighter": {
"$type": "color",
"$value": {
"dark": {
"model": "rgb",
"red": 41,
"green": 52,
"blue": 67,
"alpha": 1
},
"light": {
"model": "rgb",
"red": 219,
"green": 236,
"blue": 254,
"alpha": 1
}
}
}
}
}
},
"dimensions": {
"$collection": {
"$modes": [
"desktop",
"mobile"
]
},
"base": {
"dimension-01": {
"$type": "dimension",
"$value": {
"mobile": {
"value": 2,
"unit": "px"
},
"desktop": {
"value": 4,
"unit": "px"
}
}
},
"dimension-02": {
"$type": "dimension",
"$value": {
"mobile": {
"value": 4,
"unit": "px"
},
"desktop": {
"value": 8,
"unit": "px"
}
}
}
}
}
}{
"version": "2",
"repository": "@organization/repository",
// Only use the personalAccessToken when working with the CLI
"personalAccessToken": "<your-personal-access-token>",
"rules": [
{
"name": "To Swift",
"parsers": [
{
"name": "to-swift",
"output": {
"type": "file",
"filePath": "public/tokens.swift"
}
}
]
}
]
}import SwiftUI
class DesignTokens {
class Color_ {
static let colorsCoreLabelBlue_baseDark = Color(red: 0.37647, green: 0.65882, blue: 0.98039, opacity: 1)
static let colorsCoreLabelBlue_baseLight = Color(red: 0.06667, green: 0.49020, blue: 0.97647, opacity: 1)
static let colorsAliasesBorderActiveDark = Color(red: 0.37647, green: 0.65882, blue: 0.98039, opacity: 1)
static let colorsAliasesBorderActiveLight = Color(red: 0.06667, green: 0.49020, blue: 0.97647, opacity: 1)
static let colorsCoreLabelBlue_lighterDark = Color(red: 0.16078, green: 0.20392, blue: 0.26275, opacity: 1)
static let colorsCoreLabelBlue_lighterLight = Color(red: 0.85882, green: 0.92549, blue: 0.99608, opacity: 1)
}
class Dimension {
static let dimensionsBaseDimension_01Desktop = 4
static let dimensionsBaseDimension_01Mobile = 2
static let dimensionsBaseDimension_02Desktop = 8
static let dimensionsBaseDimension_02Mobile = 4
}
}{
"version": "2",
"repository": "@organization/repository",
// Only use the personalAccessToken when working with the CLI
"personalAccessToken": "<your-personal-access-token>",
"rules": [
{
"name": "To JavaScript",
"parsers": [
{
"name": "to-javascript",
"output": {
"type": "file",
"filePath": "tokens.js"
}
}
]
}
]
}/**
* @enum {string} All the valid paths for the collection colors.
* Use it when calling `getColorsTokenByMode`
*/
export const colorsColorPath = {
'colors.Core.blue-100': 'colors.Core.blue-100',
'colors.Core.blue-700': 'colors.Core.blue-700',
'colors.semantic.background.button.primary.hover': 'colors.semantic.background.button.primary.hover'
};
/**
* All the modes of the collection colors.
* Use it when calling `getColorsTokenByMode`
*/
export const colorsModes = [ 'light', 'dark' ];
/**
* All the tokens of the collection colors.
* Use `getColorsTokenByMode` to retrieve the tokens
*/
export const colors = {
'colors.Core.blue-100': { dark: 'rgb(229, 29, 29)', light: 'rgb(255, 255, 255)' },
'colors.Core.blue-700': { dark: 'rgb(229, 0, 0)', light: 'rgb(255, 200, 255)' },
'colors.semantic.background.button.primary.hover': { dark: 'rgb(229, 29, 29)', light: 'rgb(255, 200, 255)' }
};
/**
* Retrieve a token for the collection 'colors'.
* @param {keyof typeof colorsPath} path - The path to the token
* @param {'light' | 'dark'} mode - The mode of the token you want to retrieve
* @returns {number | string} The value of a token for a given mode
*/
export function getColorsTokenByMode(path, mode) {
if (!colors[path]) {
throw new Error("Path: '" + path + "' doesn't exist for collection 'colors'. Here are all the valid paths for each type:" + `
- color:
- colors.Core.blue-100
- colors.Core.blue-700
- colors.semantic.background.button.primary.hover`)
}
if (!colors[path][mode]) {
throw new Error("Invalid mode '" + mode.toString() + "' for collection 'colors' at path '" + path + "', here are all the valid modes:\n- " + Object.keys(colors[path]).join('\n- '))
}
return colors[path][mode]
}{
"version": "2",
"repository": "@organization/repository",
// Only use the personalAccessToken when working with the CLI
"personalAccessToken": "<your-personal-access-token>",
"rules": [
{
"name": "Generate tokens in JSON",
"parsers": [
{
"name": "to-sdtf",
"output": {
"type": "file",
"filePath": "output/tokens.json"
}
}
]
}
]
}{
"colors": {
"$collection": {
"$modes": [
"light",
"dark"
]
},
"Core": {
"blue-100": {
"$type": "color",
"$value": {
"dark": {
"red": 229,
"blue": 29,
"alpha": 1,
"green": 29,
"model": "rgb"
},
"light": {
"red": 255,
"blue": 255,
"alpha": 1,
"green": 255,
"model": "rgb"
}
},
"$description": "token 1 aliased with n modes within collection within n groups"
},
"blue-700": {
"$type": "color",
"$value": {
"dark": {
"red": 229,
"blue": 0,
"alpha": 1,
"green": 0,
"model": "rgb"
},
"light": {
"red": 255,
"blue": 255,
"alpha": 1,
"green": 200,
"model": "rgb"
}
},
"$description": "token 2 aliased with n modes within collection within n groups"
}
},
"semantic": {
"background": {
"button": {
"primary": {
"hover": {
"$type": "color",
"$value": {
"dark": {
"$mode": "dark",
"$alias": "colors.Core.blue-100"
},
"light": {
"$mode": "light",
"$alias": "colors.Core.blue-700"
}
},
"$description": "alias token with n modes within collection within n groups"
}
}
}
}
}
}
}{
"version": "2",
"repository": "@organization/repository",
// Only use the personalAccessToken when working with the CLI
"personalAccessToken": "<your-personal-access-token>",
"rules": [
{
"name": "To TypeScript",
"parsers": [
{
"name": "to-typescript",
"output": {
"type": "file",
"filePath": "tokens.ts"
}
}
]
}
]
}/**
* @enum {string} All the valid paths for the collection colors.
* Use it when calling `getColorsTokenByMode`
*/
export const colorsColorPath = {
'colors.Core.blue-100': 'colors.Core.blue-100',
'colors.Core.blue-700': 'colors.Core.blue-700',
'colors.semantic.background.button.primary.hover': 'colors.semantic.background.button.primary.hover'
} as const;
export type colorsColorPathType = keyof typeof colorsColorPath;
export type colorsPathType = colorsColorPathType;
/**
* All the modes of the collection colors.
* Use it when calling `getColorsTokenByMode`
*/
export const colorsModes = [ 'light', 'dark' ] as const;
export type colorsModesType = typeof colorsModes[number];
/**
* All the tokens of the collection colors.
* Use `getColorsTokenByMode` to retrieve the tokens
*/
export const colors = {
'colors.Core.blue-100': { dark: 'rgb(229, 29, 29)', light: 'rgb(255, 255, 255)' },
'colors.Core.blue-700': { dark: 'rgb(229, 0, 0)', light: 'rgb(255, 200, 255)' },
'colors.semantic.background.button.primary.hover': { dark: 'rgb(229, 29, 29)', light: 'rgb(255, 200, 255)' }
} as const;
/**
* Retrieve a token for the collection 'colors'.
* @param {keyof typeof colorsPath} path - The path to the token
* @param {'light' | 'dark'} mode - The mode of the token you want to retrieve
* @returns {number | string} The value of a token for a given mode
*/
export function getColorsTokenByMode<T extends colorsPathType, M extends keyof typeof colors[T]>(path: T, mode: M) {
if (!colors[path]) {
throw new Error("Path: '" + path + "' doesn't exist for collection 'colors'. Here are all the valid paths for each type:" + `
- color:
- colors.Core.blue-100
- colors.Core.blue-700
- colors.semantic.background.button.primary.hover`)
}
if (!colors[path][mode]) {
throw new Error("Invalid mode '" + mode.toString() + "' for collection 'colors' at path '" + path + "', here are all the valid modes:\n- " + Object.keys(colors[path]).join('\n- '))
}
return colors[path][mode]
}{
"colors": {
"$collection": { "$modes": ["light", "dark"] },
"core": {
"blue-100": {
"$type": "color",
"$description": "token 1 aliased with n modes within collection within n groups",
"$value": {
"light": {
"red": 255,
"blue": 255,
"alpha": 1,
"green": 255,
"model": "rgb"
},
"dark": {
"red": 229,
"blue": 29,
"alpha": 1,
"green": 29,
"model": "rgb"
}
}
},
"blue-700": {
"$type": "color",
"$description": "token 2 aliased with n modes within collection within n groups",
"$value": {
"light": {
"red": 255,
"blue": 255,
"alpha": 1,
"green": 200,
"model": "rgb"
},
"dark": {
"red": 229,
"blue": 0,
"alpha": 1,
"green": 0,
"model": "rgb"
}
}
}
},
"semantic": {
"background": {
"button": {
"primary": {
"hover": {
"$type": "color",
"$description": "alias token with n modes within collection within n groups",
"$value": {
"dark": {
"$mode": "dark",
"$alias": "colors.core.blue-100"
},
"light": {
"$mode": "light",
"$alias": "colors.core.blue-700"
}
}
}
}
}
}
}
}
}
{
"version": "2",
"repository": "@organization/repository",
// Only use the personalAccessToken when working with the CLI
"personalAccessToken": "<your-personal-access-token>",
"rules": [
{
"name": "Generate Style Dictionary raw token files",
"parsers": [
{
"name": "to-style-dictionary",
"output": {
"type": "directory",
"directoryPath": "output/tokens"
}
}
]
}
]
}{
"colors": {
"color": {
"light": {
"core": {
"blue-100": {
"value": "rgb(255, 255, 255)",
"type": "color",
"description": "token 1 aliased with n modes within collection within n groups"
},
"blue-700": {
"value": "rgb(255, 200, 255)",
"type": "color",
"description": "token 2 aliased with n modes within collection within n groups"
}
}
}
}
}
}{
"colors": {
"color": {
"dark": {
"core": {
"blue-100": {
"value": "rgb(229, 29, 29)",
"type": "color",
"description": "token 1 aliased with n modes within collection within n groups"
},
"blue-700": {
"value": "rgb(229, 0, 0)",
"type": "color",
"description": "token 2 aliased with n modes within collection within n groups"
}
}
}
}
}
}{
"colors": {
"color": {
"light": {
"semantic": {
"background": {
"button": {
"primary": {
"hover": {
"value": "{colors.color.light.core.blue-700}",
"type": "color",
"description": "alias token with n modes within collection within n groups"
}
}
}
}
}
}
}
}
}{
"font": {
"interRegular": {
"$type": "font",
"$value": {
"default": {
"family": "Inter",
"postScriptName": "Inter Regular",
"weight": "regular",
"style": "normal",
"files": [
{
"format": "ttf",
"url": "https://static.specifyapp.com/sdtf-seeds/inter-regular.ttf",
"provider": "Specify"
}
]
}
}
},
"interMedium": {
"$type": "font",
"$value": {
"default": {
"family": "Inter",
"postScriptName": "Inter Medium",
"weight": "medium",
"style": "normal",
"files": [
{
"format": "ttf",
"url": "https://static.specifyapp.com/sdtf-seeds/inter-medium.ttf",
"provider": "Specify"
}
]
}
}
},
"interBold": {
"$type": "font",
"$value": {
"default": {
"family": "Inter",
"postScriptName": "Inter Bold",
"weight": "bold",
"style": "normal",
"files": [
{
"format": "ttf",
"url": "https://static.specifyapp.com/sdtf-seeds/inter-bold.ttf",
"provider": "Specify"
}
]
}
}
},
"firaCodeRegular": {
"$type": "font",
"$value": {
"default": {
"family": "Fira Code",
"postScriptName": "Fira Code Regular",
"weight": "regular",
"style": "normal",
"files": [
{
"format": "ttf",
"url": "https://static.specifyapp.com/sdtf-seeds/fira-code-regular.ttf",
"provider": "Specify"
}
]
}
}
}
}
}{
"version": "2",
"repository": "@organization/repository",
// Only use the personalAccessToken when working with the CLI
"personalAccessToken": "<your-personal-access-token>",
"rules": [
{
"name": "Generate font imports",
"parsers": [
{
"name": "to-css-font-import",
"output": {
"type": "file",
"filePath": "public/fonts.css"
},
"options": {
"fontsPath": "assets/fonts/"
}
}
]
}
]
}@font-face {
font-family: 'Fira Code';
src: url('assets/fonts/Fira Code.woff') format('woff'), url('assets/fonts/Fira Code.woff2') format('woff2');
font-display: swap;
font-weight: regular;
}
@font-face {
font-family: 'Inter';
src: url('assets/fonts/Inter.woff') format('woff'), url('assets/fonts/Inter.woff2') format('woff2');
font-display: swap;
font-weight: bold;
}
@font-face {
font-family: 'Inter';
src: url('assets/fonts/Inter.woff') format('woff'), url('assets/fonts/Inter.woff2') format('woff2');
font-display: swap;
font-weight: medium;
}
@font-face {
font-family: 'Inter';
src: url('assets/fonts/Inter.woff') format('woff'), url('assets/fonts/Inter.woff2') format('woff2');
font-display: swap;
font-weight: regular;
}| { collection: string | true }
| { group: string | true }
| { token: string | true }
| SDTFQuery| { collection: string | true }
| { group: string | true }
| { token: string | true }
| SDTFQuery{
"version": "2",
"head": "specifyrc-json",
"base": "main",
"repository": "@organization/repository",
"rules": [
{
"name": "Generate tokens as a React Native theme",
"parsers": [
{
"name": "convert-dimension",
"options": {
"toFormat": null
}
},
{
"name": "to-react-native",
"output": {
"type": "file",
"filePath": "theme.js"
}
}
]
},
{
"name": "Optimize and transform vectors with svgo + Generate JSX components",
"parsers": [
{
"name": "svgo",
"options": {
"svgo": {
"plugins": [
{
"name": "removeDimensions"
},
{
"name": "convertColors",
"params": {
"currentColor": true
}
}
]
}
}
},
{
"name": "svg-to-jsx",
"output": {
"type": "directory",
"directoryPath": "output/assets"
}
}
]
}
]
}import {
dimensionToCss,
breakpointToCss,
textStyleToCss,
createResolveAliasStrategy
} from '@specify/sdk/css'
const strategy = createResolveAliasStrategy()
const output = tokenState.matchByType(
{
dimension: dimensionToCss(strategy),
breakpoint: breakpointToCss(strategy),
textStyle: textStyleToCss(strategy)
},
_ => undefined
)import { dimensionToCss } from '@specify/sdk/css'
if (!tokenState.isFullyResolvable) {
return
}
const strategy = createResolveAliasStrategy()
tokenState.matchByType(
{
dimension: dimensionToCss(strategy)
},
_ => undefined
)const strategy = createResolveAliasStrategy()
// Token value: [{ value: 12, unit: 'px'}, { $alias: 'mySpacing', $mode: 'default' }]
tokenState.matchByType(
{
spacings: spacingsToCss(strategy) // -> 12px 24px
},
_ => undefined
)const strategy = createAliasToVarStrategy({ tokenNotInCollectionNameTemplate: '--{{token}}}' })
// Token value: [{ value: 12, unit: 'px'}, { $alias: 'mySpacing', $mode: 'default' }]
tokenState.matchByType(
{
spacings: spacingsToCss(strategy) // -> 12px var(--mySpacing)
},
_ => undefined
)const resolvableStrategy = createResolveAliasStrategy()
const unresolvableStrategy = createThrowOnUnresolvableStrategy()
// Token value: [{ value: 12, unit: 'px'}, { $alias: 'wrong.token', $mode: 'default' }]
tokenState.matchByType(
{
// -> Error: 'wrong.token' is unresolvable
spacings: spacingsToCss(resolvableStrategy, unresolvableStrategy)
},
_ => undefined
)const resolvableStrategy = createResolveAliasStrategy()
const unresolvableStrategy = createIgnoreUnresolvableStrategy()
// Token value: [{ value: 12, unit: 'px'}, { $alias: 'wrong.token', $mode: 'default' }]
tokenState.matchByType(
{
// -> 12px undefined
spacings: spacingsToCss(resolvableStrategy, unresolvableStrategy)
},
_ => undefined
)const resolvableStrategy = createResolveAliasStrategy()
const unresolvableStrategy = createUnresolvableAliasToVarStrategy({
tokenNotInCollectionNameTemplate: '--{{token}}'
})
// Token value: [{ value: 12, unit: 'px'}, { $alias: 'wrong.token', $mode: 'default' }]
tokenState.matchByType(
{
// -> 12px var(--wrong-token)
spacings: spacingsToCss(resolvableStrategy, unresolvableStrategy)
},
_ => undefined
)type ResolvableAliasStrategy<
Return,
Composites extends SpecifyDesignTokenTypeName
> = <
Alias extends AllResolvableAlias = AllResolvableAlias,
>(
alias: Alias,
) => Alias extends ResolvableTopLevelAlias
? {
[mode: string]: Alias extends AllResolvableAlias<Composites>
? Record<string, Return>
: Return;
}
: Alias extends AllResolvableAlias<Composites>
? Record<string, Return>
: Return;type AllResolvableAlias<
Type extends SpecifyDesignTokenTypeName = SpecifyDesignTokenTypeName,
> =
| ResolvableValueLevelAlias<Type>
| ResolvableModeLevelAlias<Type>
| ResolvableTopLevelAlias<Type>;
type CssResolvableAliasStrategy = ResolvableAliasStrategy<
string,
'font' | 'textStyle' | 'transition'
>;
import {
ResolvableValueLevelAlias,
ResolvableModeLevelAlias,
ResolvableTopLevelAlias
} from '@specify/specify-design-token-format'
import { CssResolvableAliasStrategy } from '@specifyapp/sdk/css'
const myCustomStrategy: CssResolvableAliasStrategy = (alias) => {
if (alias instanceof ResolvableTopLevelAlias) {
...
} else if (alias instanceof ResolvableModeLevelAlias) {
...
} else {
...
}
}
tokenState.matchByType({
dimension: dimensionToCss(myCustomStrategy)
}, _ => undefined){
value: 12,
unit: "px"
}"12px"{
duration: {
value: 12,
unit: 's',
},
delay: {
value: 0,
unit: 'ms',
},
timingFunction: [0.1, 0.2, 0.1, 0.4]
}{
delay: "12s",
duration: "0ms",
"timing-function": "cubic-bezier(0.1, 0.2, 0.1, 0.4)"
}import { parsers } from "@specifyapp/sdk";
const executePipelines = sdtfClient.createParsersPipelines(
parsers.toTailwind({ output: { type: "file", filePath: "./tailwind.theme.js" } })
);const results = await executePipelines();
results.debug();// ...
const results = await executePipelines();
const report = await results.writeToDisk('./public');import { parsers } from "@specifyapp/sdk";
const results = await sdtfClient.createParsersPipelines(
parsers.toTailwind({ output: { type: "file", filePath: "./tailwind.theme.js" } }),
parsers.toJsonList({ output: { type: 'file', filePath: 'tokens-list.json' } })
)()import { parsers, chainParserFunctions } from "@specifyapp/sdk";
const results = await sdtfClient.createParsersPipelines(
chainParserFunctions(
svgo({ options: { svgo: { ... }}}),
svgToJsx({ output: { type: 'directory', directoryPath: 'icons' } })
)
)()import { parsers, chainParserFunctions } from "@specifyapp/sdk";
const results = await sdtfClient.createParsersPipelines(
svgo({
options: {
shouldExecuteRemotely: true,
svgo: { ... }
},
output: { type: 'directory', directoryPath: 'icons' }
}),
)()const executePipelines = await sdtfClient.createParsersPipelinesFromRules({
name: 'Icons to JSX',
parsers: [
{
name: 'svgo',
options: { svgo: { ... } },
},
{
name: 'svg-to-jsx',
output: { type: 'directory', directoryPath: 'icons' },
},
],
});const executePipelines = await sdtfClient.createParsersPipelinesFromRules({
name: 'Icons to JSX',
shouldExecuteRemotely: true,
parsers: [ ... ],
});import { SpecifyDesignTokenFormat } from '@specifyapp/specify-design-token-format'
import { ParserToolbox, SDTFEngineDataBox } from '@specifyapp/sdk/bulk'
function parserName(
input: SDTFEngineDataBox,
toolbox: ParserToolbox,
) {
const engine = input.engine;
const names = engine
.query
.getAllTokenStates()
.map(tokenState => tokenState.name);
toolbox.populateOutput(
{
type: 'files',
files: [{ path: 'names.txt', content: { type: 'text', text: names.join('\n') } }]
}
)
return input
}const names = tokenTreeClient
.engine
.query
.getAllTokenStates()
.map(tokenState => tokenState.name);toolbox.populateOutput(
{
type: 'files',
files: [{ path: 'names.txt', content: { type: 'text', text: names.join('\n') } }]
}
)return input/).


{
"colors": {
"$collection": {
"$modes": ["light", "dark"]
},
"info": {
"infoToken": {
"$type": "color",
"$value": {
"light": {
"model": "rgb",
"red": 219,
"green": 234,
"blue": 254,
"alpha": 1
},
"dark": {
"model": "rgb",
"red": 219,
"green": 234,
"blue": 254,
"alpha": 1
}
}
}
},
"danger": {
"dangerToken": {
"$type": "color",
"$value": {
"light": {
"model": "rgb",
"red": 209,
"green": 204,
"blue": 204,
"alpha": 1
},
"dark": {
"model": "rgb",
"red": 19,
"green": 34,
"blue": 54,
"alpha": 1
}
}
}
}
}
}interface parser {
name: 'filter';
options: {
query: SDTFQuery;
resolveAliases?: boolean;
allowUnresolvableAliases?: boolean;
deduplicate: true | undefined;
failOnMutate: true | undefined;
};
}{
"colors": {
"Colors/Black": {
"$type": "color",
"$value": {
"default": {
"model": "hex",
"hex": "#000000",
"alpha": 1
}
}
}
}
}{
"version": "2",
"repository": "@organization/repository",
// Only use the personalAccessToken when working with the CLI
"personalAccessToken": "<your-personal-access-token>",
"rules": [
{
"name": "Rename tokens",
"parsers": [
{
"name": "replace-string",
"options": {
"token": {
"regex": {
"pattern": "(.*?)\\/",
"flags": "g"
},
"replaceBy": ""
}
}
},
{
"name": "to-sdtf",
"output": {
"type": "file",
"filePath": "tokens.json"
}
}
]
}
]
}{
"colors": {
"Black": {
"$type": "color",
"$value": {
"default": {
"model": "hex",
"hex": "#000000",
"alpha": 1
}
}
}
}
}interface parser {
name: 'replace-string';
options: ({
all?: string | {
regex: string | { pattern: string, flags?: 'g' & 'm' & 'i' },
replaceBy: string
}
} |
{
group?: string | {
regex: string | { pattern: string, flags?: 'g' & 'm' & 'i' },
replaceBy: string
};
collection?: string | {
regex: string | { pattern: string, flags?: 'g' & 'm' & 'i' },
replaceBy: string
};
token?: string | {
regex: string | { pattern: string, flags?: 'g' & 'm' & 'i' },
replaceBy: string
}
}) & { applyTo?: SDTFQuery }
}{
"Text styles": {
"Body": {
"$type": "textStyle",
"$value": {
"default": {
"font": {
"family": "Neue Haas Grotesk Text Pro",
"postScriptName": "Neue Haas Grotesk Text Pro",
"weight": "roman",
"style": "normal",
"files": []
},
"fontSize": {
"value": 14,
"unit": "px"
},
"color": null,
"fontFeatures": null,
"lineHeight": {
"value": 21,
"unit": "px"
},
"letterSpacing": {
"value": 0.2,
"unit": "px"
},
"paragraphSpacing": {
"value": 0,
"unit": "px"
},
"textAlignHorizontal": null,
"textAlignVertical": null,
"textDecoration": "none",
"textIndent": {
"value": 0,
"unit": "px"
},
"textTransform": "none"
}
},
"$extensions": {
"com.specifyapp.figmaStyles.hangingList": false,
"com.specifyapp.figmaStyles.leadingTrim": "NONE",
"com.specifyapp.figmaStyles.listSpacing": 0,
"com.specifyapp.figmaStyles.hangingPunctuation": false
}
},
"Body-lg": {
"$type": "textStyle",
"$value": {
"default": {
"font": {
"family": "Neue Haas Grotesk Text Pro",
"postScriptName": "Neue Haas Grotesk Text Pro",
"weight": "roman",
"style": "normal",
"files": []
},
"fontSize": {
"value": 16,
"unit": "px"
},
"color": null,
"fontFeatures": null,
"lineHeight": {
"value": 150,
"unit": "%"
},
"letterSpacing": {
"value": 0.4,
"unit": "px"
},
"paragraphSpacing": {
"value": 0,
"unit": "px"
},
"textAlignHorizontal": null,
"textAlignVertical": null,
"textDecoration": "none",
"textIndent": {
"value": 0,
"unit": "px"
},
"textTransform": "none"
}
},
"$extensions": {
"com.specifyapp.figmaStyles.hangingList": false,
"com.specifyapp.figmaStyles.leadingTrim": "NONE",
"com.specifyapp.figmaStyles.listSpacing": 0,
"com.specifyapp.figmaStyles.hangingPunctuation": false
}
},
"Body-sm": {
"$type": "textStyle",
"$value": {
"default": {
"font": {
"family": "Neue Haas Grotesk Text Pro",
"postScriptName": "Neue Haas Grotesk Text Pro",
"weight": "roman",
"style": "normal",
"files": []
},
"fontSize": {
"value": 12,
"unit": "px"
},
"color": null,
"fontFeatures": null,
"lineHeight": {
"value": 150,
"unit": "%"
},
"letterSpacing": {
"value": 0.2,
"unit": "px"
},
"paragraphSpacing": {
"value": 0,
"unit": "px"
},
"textAlignHorizontal": null,
"textAlignVertical": null,
"textDecoration": "none",
"textIndent": {
"value": 0,
"unit": "px"
},
"textTransform": "none"
}
},
"$extensions": {
"com.specifyapp.figmaStyles.hangingList": false,
"com.specifyapp.figmaStyles.leadingTrim": "NONE",
"com.specifyapp.figmaStyles.listSpacing": 0,
"com.specifyapp.figmaStyles.hangingPunctuation": false
}
}
}
}{
"version": "2",
"repository": "@organization/repository",
// Only use the personalAccessToken when working with the CLI
"personalAccessToken": "<your-personal-access-token>",
"rules": [
{
"name": "Generate text styles",
"parsers": [
{
"name": "to-css-text-style",
"output": {
"type": "file",
"filePath": "public/text-styles.scss"
},
"options": {
"genericFamily": "sans-serif"
}
}
]
}
]
}.Text-styles-Body {
font-family: Neue Haas Grotesk Text Pro, sans-serif;
font-size: 14px;
line-height: 21px;
letter-spacing: 0.2px;
font-weight: roman;
}
.Text-styles-Body-lg {
font-family: Neue Haas Grotesk Text Pro, sans-serif;
font-size: 16px;
line-height: 150%;
letter-spacing: 0.4px;
font-weight: roman;
}
.Text-styles-Body-sm {
font-family: Neue Haas Grotesk Text Pro, sans-serif;
font-size: 12px;
line-height: 150%;
letter-spacing: 0.2px;
font-weight: roman;
}interface parser {
name: 'to-css-text-style';
output: {
type: 'file';
filePath: string;
};
options?: {
tokenNameTemplate?: string;
exclude?: Array<
| 'fontFamily'
| 'fontWeight'
| 'fontSize'
| 'color'
| 'fontFeatures'
| 'lineHeight'
| 'letterSpacing'
| 'paragraphSpacing'
| 'textAlignHorizontal'
| 'textAlignVertical'
| 'textDecoration'
| 'textIndent'
| 'textTransform'
>;
include?: Array<
| 'fontFamily'
| 'fontWeight'
| 'fontSize'
| 'color'
| 'fontFeatures'
| 'lineHeight'
| 'letterSpacing'
| 'paragraphSpacing'
| 'textAlignHorizontal'
| 'textAlignVertical'
| 'textDecoration'
| 'textIndent'
| 'textTransform'
>;
genericFamily?: string;
};
}{
"Text styles": {
"Body": {
"$type": "textStyle",
"$value": {
"default": {
"font": {
"family": "Neue Haas Grotesk Text Pro",
"postScriptName": "Neue Haas Grotesk Text Pro",
"weight": "roman",
"style": "normal",
"files": []
},
"fontSize": {
"value": 14,
"unit": "px"
},
"color": null,
"fontFeatures": null,
"lineHeight": {
"value": 21,
"unit": "px"
},
"letterSpacing": {
"value": 0.2,
"unit": "px"
},
"paragraphSpacing": {
"value": 0,
"unit": "px"
},
"textAlignHorizontal": null,
"textAlignVertical": null,
"textDecoration": "none",
"textIndent": {
"value": 0,
"unit": "px"
},
"textTransform": "none"
}
},
"$extensions": {
"com.specifyapp.figmaStyles.hangingList": false,
"com.specifyapp.figmaStyles.leadingTrim": "NONE",
"com.specifyapp.figmaStyles.listSpacing": 0,
"com.specifyapp.figmaStyles.hangingPunctuation": false
}
},
"Body-lg": {
"$type": "textStyle",
"$value": {
"default": {
"font": {
"family": "Neue Haas Grotesk Text Pro",
"postScriptName": "Neue Haas Grotesk Text Pro",
"weight": "roman",
"style": "normal",
"files": []
},
"fontSize": {
"value": 16,
"unit": "px"
},
"color": null,
"fontFeatures": null,
"lineHeight": {
"value": 150,
"unit": "%"
},
"letterSpacing": {
"value": 0.4,
"unit": "px"
},
"paragraphSpacing": {
"value": 0,
"unit": "px"
},
"textAlignHorizontal": null,
"textAlignVertical": null,
"textDecoration": "none",
"textIndent": {
"value": 0,
"unit": "px"
},
"textTransform": "none"
}
},
"$extensions": {
"com.specifyapp.figmaStyles.hangingList": false,
"com.specifyapp.figmaStyles.leadingTrim": "NONE",
"com.specifyapp.figmaStyles.listSpacing": 0,
"com.specifyapp.figmaStyles.hangingPunctuation": false
}
},
"Body-sm": {
"$type": "textStyle",
"$value": {
"default": {
"font": {
"family": "Neue Haas Grotesk Text Pro",
"postScriptName": "Neue Haas Grotesk Text Pro",
"weight": "roman",
"style": "normal",
"files": []
},
"fontSize": {
"value": 12,
"unit": "px"
},
"color": null,
"fontFeatures": null,
"lineHeight": {
"value": 150,
"unit": "%"
},
"letterSpacing": {
"value": 0.2,
"unit": "px"
},
"paragraphSpacing": {
"value": 0,
"unit": "px"
},
"textAlignHorizontal": null,
"textAlignVertical": null,
"textDecoration": "none",
"textIndent": {
"value": 0,
"unit": "px"
},
"textTransform": "none"
}
},
"$extensions": {
"com.specifyapp.figmaStyles.hangingList": false,
"com.specifyapp.figmaStyles.leadingTrim": "NONE",
"com.specifyapp.figmaStyles.listSpacing": 0,
"com.specifyapp.figmaStyles.hangingPunctuation": false
}
}
}
}{
"version": "2",
"repository": "@organization/repository",
// Only use the personalAccessToken when working with the CLI
"personalAccessToken": "<your-personal-access-token>",
"rules": [
{
"name": "to-scss-mixin-text-style",
"output": {
"type": "file",
"filePath": "public/text-styles.scss"
},
"options": {
"genericFamily": "sans-serif"
}
}
]
}@mixin Text-styles-Body {
font-family: Neue Haas Grotesk Text Pro, sans-serif;
font-size: 14px;
line-height: 1.5;
letter-spacing: 0.2px;
font-weight: roman;
}
@mixin Text-styles-Body-lg {
font-family: Neue Haas Grotesk Text Pro, sans-serif;
font-size: 16px;
line-height: 1.5;
letter-spacing: 0.4px;
font-weight: roman;
}
@mixin Text-styles-Body-sm {
font-family: Neue Haas Grotesk Text Pro, sans-serif;
font-size: 12px;
line-height: 1.5;
letter-spacing: 0.2px;
font-weight: roman;
}interface parser {
name: 'to-scss-mixin-text-style';
output: {
type: 'file';
filePath: string;
};
options?: {
tokenNameTemplate?: string;
exclude?: Array<
| 'fontFamily'
| 'fontWeight'
| 'fontSize'
| 'color'
| 'fontFeatures'
| 'lineHeight'
| 'letterSpacing'
| 'paragraphSpacing'
| 'textAlignHorizontal'
| 'textAlignVertical'
| 'textDecoration'
| 'textIndent'
| 'textTransform'
>;
include?: Array<
| 'fontFamily'
| 'fontWeight'
| 'fontSize'
| 'color'
| 'fontFeatures'
| 'lineHeight'
| 'letterSpacing'
| 'paragraphSpacing'
| 'textAlignHorizontal'
| 'textAlignVertical'
| 'textDecoration'
| 'textIndent'
| 'textTransform'
>;
genericFamily?: string;
};
}{
"Fonts": {
"Inter Regular": {
"$type": "font",
"$value": {
"default": {
"family": "Inter Regular",
"postScriptName": "Inter Regular",
"weight": "regular",
"style": "normal",
"files": [
{
"format": "ttf",
"url": "https://static.specifyapp.com/sdtf-seeds/inter-regular.ttf",
"provider": "external"
}
]
}
}
}
}
}type Font = {
$type: 'font';
$value: {
[mode: string]: {
family: string;
postScriptName: string;
weight:
| 'thin'
| 'hairline'
| 'extra-light'
| 'ultra-light'
| 'light'
| 'normal'
| 'plain'
| 'standard'
| 'regular'
| 'roman'
| 'book'
| 'medium'
| 'semi-bold'
| 'demi-bold'
| 'bold'
| 'extra-bold'
| 'ultra-bold'
| 'black'
| 'heavy'
| 'extra-black'
| 'ultra-black'
| number; // [100-1000]
style: 'normal' | 'italic';
files: Array<{
url: string;
format: 'ttf' | 'woff' | 'woff2' | 'otf' | 'eot';
provider: 'external' | 'Specify' | 'Google Fonts' | 'Adobe Fonts';
}>;
};
};
};{
"name": "Font files",
"parsers": [
{
"name": "filter",
"options": {
"query": {
"where": { "group": "^Fonts$", "select": { "children": true } }
}
}
},
{
"name": "change-case",
"options": {
"change": "names",
"toCase": "kebabCase"
}
},
{
"name": "to-file",
"options": {
"filenameTemplate": "fonts/{{name}}{{extension}}"
},
"output": {
"type": "directory",
"directoryPath": "./public"
}
}
]
}interface parser {
name: 'to-react-native';
output: {
type: 'file';
filePath: string;
};
options?: {
typescript?: boolean;
moduleExport?: 'es6' | 'commonjs';
};
}interface parser {
name: 'to-css-custom-properties';
output: {
type: 'file';
filePath: string;
};
options?: {
tokenNameTemplate?: string;
selectorTemplate?: string;
tokenNotInCollectionNameTemplate?: string;
includeCoreTokensInScopes?: boolean;
allowUnresolvable?: boolean;
withSDTFView?: string;
};
}{
"version": "2",
"repository": "@organization/repository",
// Only use the personalAccessToken when working with the CLI
"personalAccessToken": "<your-personal-access-token>",
"rules": [
{
"name": "Only get tokens from a group named 'info' and gererate tokens in JSON",
"parsers": [
{
"name": "filter",
"options": {
"query": {
"where": {
"group": "info",
"select": {
"parents": true,
"children": true
}
}
}
}
},
{
"name": "to-sdtf",
"output": {
"type": "file",
"filePath": "tokens.json"
}
}
]
}
]
}{
"colors": {
"$collection": {
"$modes": ["light", "dark"]
},
"info": {
"infoToken": {
"$type": "color",
"$value": {
"light": {
"model": "rgb",
"red": 219,
"green": 234,
"blue": 254,
"alpha": 1
},
"dark": {
"model": "rgb",
"red": 219,
"green": 234,
"blue": 254,
"alpha": 1
}
}
}
}
}
}{
"version": "2",
"repository": "@organization/repository",
// Only use the personalAccessToken when working with the CLI
"personalAccessToken": "<your-personal-access-token>",
"rules": [
{
"name": "To React Native theme",
"parsers": [
{
"name": "to-react-native",
"output": {
"type": "file",
"filePath": "public/theme.js"
}
}
]
}
]
}/**
* @typedef {'primitive.spacing.1'} DimensionPath - All the valid paths for the tokens of type dimension.
* To use this type you can do: `@type {import('path/to/myTokensFile').DimensionPath}`
*/
/**
* @typedef {'themedColor.highEmphasis'} ColorPath - All the valid paths for the tokens of type color.
* To use this type you can do: `@type {import('path/to/myTokensFile').ColorPath}`
*/
/**
* @typedef {DimensionPath | ColorPath} AllPath - All possible paths
*/
/**
* @typedef {typeof pathsByType} PathsByType - All the paths for a given token type. Needed for `getTokensByType`
*/
const pathsByType = /** @type {const} */ ({
dimension: [ 'primitive.spacing.1' ],
color: [ 'themedColor.highEmphasis' ]
});
/**
* @typedef {typeof colorModes[number]} ColorModes - All the valid modes of color.
* To use this type you can do: `@type {import('path/to/myTokensFile').ColorModes}`
*/
export const colorModes = /** @type {const} */ ([ 'dark', 'light' ]);
/**
* @typedef {typeof themedColorModes[number]} ThemedcolorModes - All the valid modes of themedColor.
* To use this type you can do: `@type {import('path/to/myTokensFile').ThemedcolorModes}`
*/
export const themedColorModes = /** @type {const} */ ([ 'light', 'dark' ]);
/**
@typedef {ColorModes | ThemedcolorModes} AllMode - All the available modes
*/
/**
* @typedef {typeof tokens} Tokens - All the tokens.
* Use `getTokenByMode` to retrieve one.
*/
export const tokens = /** @type {const} */ ({
'primitive.spacing.1': '4px',
'themedColor.highEmphasis': { dark: '#ffffff', light: '#000000' }
});
/**
* Retrieve any token for a given mode. If available, the default mode will be: 'default'
* @template {AllPath} Path - A generic extending all the possible paths
* @template {Tokens[Path] extends Record<string, any>
? keyof Tokens[Path]
: undefined} Mode - A generic representing all the valid modes for a given path
* @template {Tokens[Path] extends Record<string, any>
? Tokens[Path][Mode extends undefined ? never : Mode]
: Tokens[Path]} Return - The return type
* @param {Path} path - The path to the token
* @param {Mode} mode - The mode of the token you want to retrieve
* @returns {Return} - The value of a token for a given mode
*/
export function getTokenByMode(path, mode) {
if (!tokens[path]) {
throw new Error("Path: '" + path + "' doesn't exist. Here are all the valid paths:\n- " + Object.keys(tokens).join('\n- '))
}
if (typeof tokens[path] !== 'object') {
return tokens[path] ;
}
if (!mode) throw new Error('Mode is undefined but it should be one of ' + Object.keys(tokens[path]).join(', ') + ' for path: ' + path);
if (!tokens[path][mode]) {
throw new Error("Invalid mode '" + mode.toString() + " at path '" + path + "', here are all the valid modes:\n- " + Object.keys(tokens[path]).join('\n- '))
}
return tokens[path][mode]
}
/**
* Retrieve all the tokens for a specific type (color, dimension, etc...).
* Note that the value will either be a string or an object if the token has modes
* @template {keyof PathsByType} Type - A generic extending all the possible types
* @template {Tokens[PathsByType[Type][number]]} Token - A generic representing a union of all the outputs
* @param {Type} type - The path to the token
* @returns {Array<Token>} - An array with all the values
*/
export function getTokensByType(type) {
if (!pathsByType[type]) {
throw new Error('The type: \'' + type + '\' does not exist')
}
return pathsByType[type].map(path => tokens[path]);
}string | {
regex: string | { pattern: string, flags: 'g' & 'm' & 'i' },
replaceBy: string
}string | {
regex: string | { pattern: string, flags: 'g' & 'm' & 'i' },
replaceBy: string
}string | {
regex: string | { pattern: string, flags: 'g' & 'm' & 'i' },
replaceBy: string
}| { collection: string | true }
| { group: string | true }
| { token: string | true }
| SDTFQuerystring | {
regex: string | { pattern: string, flags: 'g' & 'm' & 'i' },
replaceBy: string
}get aliases: Array<StatefulAliasReference>;get type: SpecifyDesignTokenTypeName;get value: SpecifyDesignToken['$value'];get modes: Array<string>;get isTopLevelAlias: boolean;get isFullyResolvable: boolean;get modesResolvability: Record<string, boolean>;get definition: DesignTokenDefinition<Type>;getCollection(): import("./CollectionState.js").CollectionState | undefined;getStatefulValueResult(): StatefulValueResult<Type>;resolveDeepStatefulValueForMode<T extends SpecifyDesignTokenTypeName = Type>(mode: string): ResolvedDeepStatefulValueForMode<T>;getUIValueResultOnMode(targetMode: string): UIValueResultSignature<Type>;rename(newName: string): boolean;renameMode(fromMode: string, toMode: string): void;updateValue(nextValue: Partial<PickSpecifyDesignToken<Type, string, false, true>['$value']>, { allowModeCreation, overrideAliases }?: UpdateOptions): void;updateModeValue(mode: string, nextValue: Partial<PickSpecifyDesignToken<Type, string, true, false>['$value']>, { overrideAliases, allowModeCreation }?: UpdateOptions): void;resolveValueAliases(): void;createModeValue(mode: string, nextValue: PickSpecifyDesignToken<Type, string, true, false>['$value']): void;deleteModeValue(mode: string): void;getJSONValue<ResolveAliases extends boolean, AllowUnresolvable extends boolean = true, TargetMode extends Mode | null = null>(options?: GetJSONTokenValueOptions<ResolveAliases, AllowUnresolvable, TargetMode>): PickSpecifyDesignToken<Type, Mode, AllowUnresolvable extends true ? true : false, TargetMode extends string ? false : true>['$value'];getJSONToken<ResolveAliases extends boolean, AllowUnresolvable extends boolean = true, TargetMode extends Mode | null = null>(options?: GetJSONTokenValueOptions<ResolveAliases, AllowUnresolvable, TargetMode>): PickSpecifyDesignToken<Type, Mode, AllowUnresolvable extends true ? true : false, TargetMode extends string ? false : true>;move(toPath: Array<string>): void;matchByType<Return>(matcher: {
[K in SpecifyDesignTokenTypeName]?: (token: TokenState<K, Value, Mode>) => Return;
}, missingFn: (token: TokenState) => Return): Return;matchJSONValueByType<MatchReturn, MissingReturn = undefined>(matcher: {
[K in Type]?: (token: PickSpecifyDesignToken<K, string, false, false>['$value'], mode: string) => MatchReturn;
}, missingFn: (token: TokenState) => MissingReturn): {
[mode: string]: MatchReturn;
} | MissingReturn | undefined;toTokenStateParams(): TokenStateParams;toAnalyzedToken(): AnalyzedToken;isString(): this is TokenState<'string'>;isNumber(): this is TokenState<'number'>;isBoolean(): this is TokenState<'boolean'>;isNull(): this is TokenState<'null'>;isArray(): this is TokenState<'array'>;isObject(): this is TokenState<'object'>;isIntegerNumber(): this is TokenState<'integerNumber'>;isZeroToOneNumber(): this is TokenState<'zeroToOneNumber'>;isArcDegreeNumber(): this is TokenState<'arcDegreeNumber'>;isRgbColorNumber(): this is TokenState<'rgbColorNumber'>;isPositiveNumber(): this is TokenState<'positiveNumber'>;isPositiveIntegerNumber(): this is TokenState<'positiveIntegerNumber'>;isPercentageNumber(): this is TokenState<'percentageNumber'>;isHexadecimalColorString(): this is TokenState<'hexadecimalColorString'>;isBitmap(): this is TokenState<'bitmap'>;isBitmapFormat(): this is TokenState<'bitmapFormat'>;isBlur(): this is TokenState<'blur'>;isBorder(): this is TokenState<'border'>;isBorderStyle(): this is TokenState<'borderStyle'>;isBorderStyleLineCap(): this is TokenState<'borderStyleLineCap'>;isBreakpoint(): this is TokenState<'breakpoint'>;isColor(): this is TokenState<'color'>;isCubicBezier(): this is TokenState<'cubicBezier'>;isDimension(): this is TokenState<'dimension'>;isDimensionUnit(): this is TokenState<'dimensionUnit'>;isDuration(): this is TokenState<'duration'>;isDurationUnit(): this is TokenState<'durationUnit'>;isFont(): this is TokenState<'font'>;isFontFamily(): this is TokenState<'fontFamily'>;isFontFeature(): this is TokenState<'fontFeature'>;isFontFeatures(): this is TokenState<'fontFeatures'>;isFontFormat(): this is TokenState<'fontFormat'>;isFontStyle(): this is TokenState<'fontStyle'>;isFontWeight(): this is TokenState<'fontWeight'>;isGradient(): this is TokenState<'gradient'>;isGradients(): this is TokenState<'gradients'>;isOpacity(): this is TokenState<'opacity'>;isRadius(): this is TokenState<'radius'>;isRadii(): this is TokenState<'radii'>;isShadow(): this is TokenState<'shadow'>;isShadows(): this is TokenState<'shadows'>;isShadowType(): this is TokenState<'shadowType'>;isSpacing(): this is TokenState<'spacing'>;isSpacings(): this is TokenState<'spacings'>;isStepsTimingFunction(): this is TokenState<'stepsTimingFunction'>;isTextAlignHorizontal(): this is TokenState<'textAlignHorizontal'>;isTextAlignVertical(): this is TokenState<'textAlignVertical'>;isTextDecoration(): this is TokenState<'textDecoration'>;isTextStyle(): this is TokenState<'textStyle'>;isTextTransform(): this is TokenState<'textTransform'>;isTransition(): this is TokenState<'transition'>;isVector(): this is TokenState<'vector'>;isVectorFormat(): this is TokenState<'vectorFormat'>;isZIndex(): this is TokenState<'zIndex'>;output option since they mutate the internal state without producing any actual output.{
"colors": {
"$collection": { "$modes": ["light", "dark"] },
"core": {
"blue-100": {
"$type": "color",
"$description": "token 1 aliased with n modes within collection within n groups",
"$value": {
"light": {
"red": 219,
"blue": 254,
"alpha": 1,
"green": 236,
"model": "rgb"
},
"dark": {
"red": 41,
"blue": 67,
"alpha": 1,
"green": 52,
"model": "rgb"
}
}
},
"blue-700": {
"$type": "color",
"$description": "token 2 aliased with n modes within collection within n groups",
"$value": {
"light": {
"red": 17,
"blue": 249,
"alpha": 1,
"green": 125,
"model": "rgb"
},
"dark": {
"red": 96,
"blue": 250,
"alpha": 1,
"green": 168,
"model": "rgb"
}
}
}
},
"semantic": {
"background": {
"button": {
"primary": {
"hover": {
"$type": "color",
"$description": "alias token with n modes within collection within n groups",
"$value": {
"dark": {
"$mode": "dark",
"$alias": "colors.core.blue-100"
},
"light": {
"$mode": "light",
"$alias": "colors.core.blue-700"
}
}
}
}
}
}
}
}
}{
"version": "2",
"repository": "@organization/repository",
// Only use the personalAccessToken when working with the CLI
"personalAccessToken": "<your-personal-access-token>",
"rules": [
{
"name": "Generate tokens as CSS Custom Properties",
"parsers": [
{
"name": "to-css-custom-properties",
"output": {
"type": "file",
"filePath": "tokens.css"
},
"options": {
"tokenNameTemplate": "--{{groups}}-{{token}}",
"selectorTemplate": "[data-theme=\"{{mode}}\"]"
}
}
]
}
]
}[data-theme="dark"] {
--core-blue-100: rgb(41, 52, 67);
--core-blue-700: rgb(96, 168, 250);
--semantic-background-button-primary-hover: var(--core-blue-100);
}
[data-theme="light"] {
--core-blue-100: rgb(219, 236, 254);
--core-blue-700: rgb(17, 125, 249);
--semantic-background-button-primary-hover: var(--core-blue-700);
}{
"Colors": {
"$collection": { "$modes": ["Light", "Dark"] },
"Core": {
"blue 100": {
"$type": "color",
"$description": "token 1 aliased with n modes within collection within n groups",
"$value": {
"Light": {
"red": 219,
"blue": 254,
"alpha": 1,
"green": 236,
"model": "rgb"
},
"Dark": {
"red": 41,
"blue": 67,
"alpha": 1,
"green": 52,
"model": "rgb"
}
}
},
"blue 700": {
"$type": "color",
"$description": "token 2 aliased with n modes within collection within n groups",
"$value": {
"Light": {
"red": 17,
"blue": 249,
"alpha": 1,
"green": 125,
"model": "rgb"
},
"Dark": {
"red": 96,
"blue": 250,
"alpha": 1,
"green": 168,
"model": "rgb"
}
}
}
},
"semantic": {
"background": {
"button": {
"primary": {
"hover": {
"$type": "color",
"$description": "alias token with n modes within collection within n groups",
"$value": {
"Dark": {
"$mode": "dark",
"$alias": "Colors.Core.blue 100"
},
"Light": {
"$mode": "light",
"$alias": "Colors.Core.blue 700"
}
}
}
}
}
}
}
}
}{
"version": "2",
"repository": "@organization/repository",
// Only use the personalAccessToken when working with the CLI
"personalAccessToken": "<your-personal-access-token>",
"rules": [
{
"name": "Convert colors in HSL and generate tokens in JSON",
"parsers": [
{
"name": "convert-color",
"options": {
"toFormat": "hsl"
}
},
{
"name": "to-sdtf",
"output": {
"type": "file",
"filePath": "tokens.json"
}
}
]
}
]
}{
"colors": {
"$collection": { "$modes": ["light", "dark"] },
"core": {
"blue-100": {
"$type": "color",
"$description": "token 1 aliased with n modes within collection within n groups",
"$value": {
"light": {
"model": "hsl",
"hue": 211,
"saturation": 95,
"lightness": 93,
"alpha": 1
},
"dark": {
"model": "hsl",
"hue": 215,
"saturation": 24,
"lightness": 21,
"alpha": 1
}
}
},
"blue-700": {
"$type": "color",
"$description": "token 2 aliased with n modes within collection within n groups",
"$value": {
"light": {
"model": "hsl",
"hue": 212,
"saturation": 95,
"lightness": 52,
"alpha": 1
},
"dark": {
"model": "hsl",
"hue": 212,
"saturation": 94,
"lightness": 68,
"alpha": 1
}
}
}
},
"semantic": {
"background": {
"button": {
"primary": {
"hover": {
"$type": "color",
"$description": "alias token with n modes within collection within n groups",
"$value": {
"dark": {
"$mode": "dark",
"$alias": "colors.core.blue-100"
},
"light": {
"$mode": "light",
"$alias": "colors.core.blue-700"
}
}
}
}
}
}
}
}
}interface parser {
name: 'convert-color';
options: {
toFormat:
| 'hex'
| 'rgb'
| 'hsl'
| 'hsb'
| 'lch'
| 'lab';
applyTo?:
| { collection: string | true }
| { group: string | true }
| { token: string | true }
| SDTFQuery;
};
}{
"colors": {
"$collection": {
"$modes": [
"light",
"dark"
]
},
"aliases": {
"border": {
"active": {
"$type": "color",
"$value": {
"dark": {
"$alias": "colors.core.label.blue-base",
"$mode": "dark"
},
"light": {
"$alias": "colors.core.label.blue-base",
"$mode": "light"
}
}
}
}
},
"core": {
"label": {
"blue-base": {
"$type": "color",
"$value": {
"dark": {
"model": "rgb",
"red": 96,
"green": 168,
"blue": 250,
"alpha": 1
},
"light": {
"model": "rgb",
"red": 17,
"green": 125,
"blue": 249,
"alpha": 1
}
}
},
"blue-lighter": {
"$type": "color",
"$value": {
"dark": {
"model": "rgb",
"red": 41,
"green": 52,
"blue": 67,
"alpha": 1
},
"light": {
"model": "rgb",
"red": 219,
"green": 236,
"blue": 254,
"alpha": 1
}
}
}
}
}
},
"dimensions": {
"$collection": {
"$modes": [
"desktop",
"mobile"
]
},
"base": {
"dimension-01": {
"$type": "dimension",
"$value": {
"mobile": {
"value": 2,
"unit": "px"
},
"desktop": {
"value": 4,
"unit": "px"
}
}
},
"dimension-02": {
"$type": "dimension",
"$value": {
"mobile": {
"value": 4,
"unit": "px"
},
"desktop": {
"value": 8,
"unit": "px"
}
}
}
}
}
}{
"version": "2",
"repository": "@organization/repository",
// Only use the personalAccessToken when working with the CLI
"personalAccessToken": "<your-personal-access-token>",
"rules": [
{
"name": "To Kotlin",
"parsers": [
{
"name": "to-kotlin",
"output": {
"type": "file",
"filePath": "public/tokens.kt"
}
}
]
}
]
}import android.content.res.Resources
import androidx.compose.animation.core.CubicBezierEasing
import androidx.compose.ui.graphics.Color
import androidx.compose.ui.text.TextStyle
import androidx.compose.ui.text.font.*
import androidx.compose.ui.unit.TextUnit
import androidx.compose.ui.unit.sp
object DesignTokens {
fun pxToDp(px: Double): Float {
return (px / Resources.getSystem().displayMetrics.density).toFloat()
}
fun pxToDp(px: Int): Float {
return px / Resources.getSystem().displayMetrics.density
}
fun pxToSp(px: Double): TextUnit {
return (px / Resources.getSystem().displayMetrics.scaledDensity).sp
}
fun pxToSp(px: Int): TextUnit {
return (px / Resources.getSystem().displayMetrics.scaledDensity).sp
}
object Color_ {
val colorsCoreLabelBlue_baseDark = Color(0.37647f, 0.65882f, 0.98039f, 1f)
val colorsCoreLabelBlue_baseLight = Color(0.06667f, 0.49020f, 0.97647f, 1f)
val colorsAliasesBorderActiveDark = Color(0.37647f, 0.65882f, 0.98039f, 1f)
val colorsAliasesBorderActiveLight = Color(0.06667f, 0.49020f, 0.97647f, 1f)
val colorsCoreLabelBlue_lighterDark = Color(0.16078f, 0.20392f, 0.26275f, 1f)
val colorsCoreLabelBlue_lighterLight = Color(0.85882f, 0.92549f, 0.99608f, 1f)
}
object Dimension {
val dimensionsBaseDimension_01Desktop = pxToDp(4)
val dimensionsBaseDimension_01Mobile = pxToDp(2)
val dimensionsBaseDimension_02Desktop = pxToDp(8)
val dimensionsBaseDimension_02Mobile = pxToDp(4)
}
}interface parser {
name: 'to-kotlin';
output: {
type: 'file';
filePath: string;
};
options?:{
tokenNameTemplate?: string;
scopeName?: string;
androidMinVersion?: number;
}
}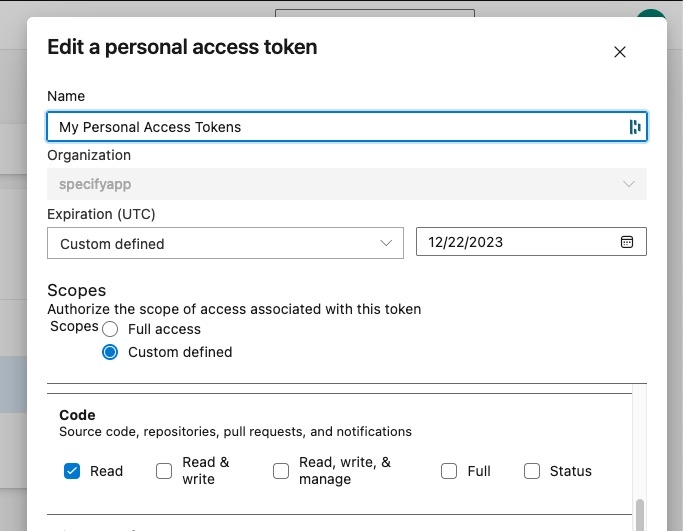
| { collection: string | true }
| { group: string | true }
| { token: string | true }
| SDTFQuery{ token: true }| 'hex'
| 'rgb'
| 'hsl'
| 'hsb'
| 'lch'
| 'lab'// Fetch a Repository
const SPECIFY_REPOSITORY_NAME = "MY-REPOSITORY-NAME";
const sdtfClient = await specifyClient.getSDTFClientByRepositoryName(
SPECIFY_REPOSITORY_NAME,
);
console.log(`Fetched repository: ${sdtfClient.repository.name}`);const jsonTokenTree = sdtfClient.getJSONTokenTree();
console.log(jsonTokenTree) // the object literal representation of the Specify Design Token dataconst tokenState = sdtfClient.getTokenState(['path', 'to', 'token'])const tokens = sdtfClient.getAllTokenStates()const groups = sdtfClient.getAllGroupStates()const collections = sdtfClient.getAllCollectionStates()const results = sdtfClient
.mapQueryResults(
{ where: { collection: '^My Collection$', select: true, children: { tokens: true } } },
(treeNodeState, engine, queryResult) => {
if (treeNodeState.isCollection) {
return treeNodeState.name
}
if (treeNodeState.isToken) {
return treeNodeState.stringPath
}
return undefined
},
);sdtfClient
.forEachQueryResult(
{ where: { token: '.*', select: true } },
(treeNodeState, engine, queryResult) => {
if (treeNodeState.isToken) {
engine.mutation.renameToken({
atPath: treeNodeState.path,
name: treeNodeState.name.toLowerCase(),
});
}
},
);{
mySize: {
$type: 'dimension',
$value: {
small: { unit: 'px', value: 12 },
large: { unit: 'px', value: 24 },
}
}
}{
sizeValue: {
$type: 'number',
$value: {
default: 12
}
},
mySize: {
$type: 'dimension',
$value: {
small: {
unit: 'px',
value: { $alias: 'sizeValue', $mode: 'default' }
},
large: {
unit: 'px',
value: 24
},
}
}
}{
anotherSize: {
$type: 'dimension',
$value: {
customMode: {
unit: 'px',
value: 12
}
}
},
mySize: {
$type: 'dimension',
$value: {
small: { $alias: 'anotherSize', $mode: 'customMode' },
large: {
unit: 'px',
value: 24
},
}
}
}{
anotherSize: {
$type: 'dimension',
$value: {
small: {
unit: 'px',
value: 12
},
large: {
unit: 'px',
value: 24
},
}
},
mySize: {
$type: 'dimension',
$value: { $alias: 'anotherSize' },
}
}console.log('Token type:', tokenState.type) // Token type: <type>tokenState.matchByType(
{
// TokenState<'dimension'>
dimension: (v) => { ... },
// TokenState<'font'>
font: (v) => { ... },
// TokenState<'textStyle'>
textStyle: (v) => { ... },
},
notMatched => { ... }
)tokenState.matchByType(
{
dimension: _ => 1,
breakpoint: _ => 'hello',
},
_ => undefined,
)tokenState.matchByType(
{
dimension: _ => 1.toString(),
breakpoint: _ => 'hello',
},
_ => undefined,
)tokenState.matchByType<string | number>(
{
dimension: _ => 1,
breakpoint: _ => 'hello',
},
_ => undefined,
)tokenState.getJSONValue({
resolveAliases: true,
allowUnresolvable: false,
targetMode: tokenState.modes[0],
})tokenState.matchJSONValueByType(
{
// { unit: 'px', value: 12 }
dimension: (v, mode) => { ... },
// { family: 'MyFont', weight: 700, ... }
font: (v, mode) => { ... },
// { lineHeight: { unit: 'px', value: 24 }, ... }
textStyle: (v, mode) => { ... },
},
notMatched => { ... }
)// TokenState<'dimension'> -> { value: 12, unit: 'px' }
tokenState
.getStatefulValueResult()
.mapResolvableTopLevelAlias(alias => { ... })
.mapUnresolvableTopLevelAlias(alias => { ... })
.mapTopLevelValue(modeLevel =>
modeLevel
.mapResolvableModeLevelAlias((alias, mode) => { ... })
.mapUnresolvableModeLevelAlias(_ => { ... })
.mapRawValue((rawValue, mode) =>
rawValue
.value
.mapPrimitiveValue(value => { ... })
.mapResolvableValueLevelAlias(alias => { ... })
.mapUnresolvableValueLevelAlias(alias => { ... })
)
.unwrap(),
)
.unwrap();
tokenState
.getStatefulValueResult()
.mapResolvableTopLevelAlias(alias => { ... })
.mapUnresolvableTopLevelAlias(alias => { ... })
.mapTopLevelValue(modeLevel => { ... })
.unwrap().mapTopLevelValue(modeLevel =>
modeLevel
.mapResolvableModeLevelAlias((alias, mode) => { ... })
.mapUnresolvableModeLevelAlias(_ => { ... })
.mapRawValue((rawValue, mode) => { ... })
.unwrap().mapRawValue((dimension, mode) => {
const value = dimension
.value
// mapPrimitiveValue is not required if you only need the value inside
// without updating it
.mapPrimitiveValue(value => { ... })
.mapUnresolvableValueLevelAlias(alias => { ... })
.mapResolvableValueLevelAlias(alias => { ... })
.unwrap()
return value
})tokenState
.getStatefulValueResult()
.resolveDeepValue()
.mapUnresolvableTopLevelAlias(alias => ...)
.mapTopLevelValue(modeLevel =>
modeLevel
.resolveDeepValue()
.mapUnresolvableModeLevelAlias(alias => ...)
.mapRawValue((dimension, mode) =>
dimension
.value
.resolveDeepValue()
.mapUnresolvableValueLevelAlias(alias => ...)
.unwrap()
)
.unwrap()
)
.unwrap()if (!tokenState.isFullyResolvable) {
return
}
const output = tokenState
.getStatefulValueResult()
.resolveDeepValue()
.mapTopLevelValue(modeLevel =>
modeLevel
.resolveDeepValue()
.mapRawValue((dimension, mode) =>
dimension
.value
.resolveDeepValue()
.unwrapValue()
)
.unwrapValue()
)
.unwrapValue()npm install @specifyapp/cli yarn global add @specifyapp/cliThis template is dedicated for Web developers using CSS. It helps you generate all types of design tokens as CSS Custom Properties in their respective CSS file and it helps you to optimize your SVG's.
const dimensionTokens: SpecifyDesignTokenFormat = {
spacing: {
$description: "Spacings for the webapp",
one: {
$description: "default spacing",
$type: "spacing",
$value: {
default: { unit: "px", value: 4 },
},
},
two: {
$description: "doubled spacing",
$type: "spacing",
$value: {
default: { unit: "px", value: 8 },
},
$extensions: { "com.specifyapp.highlighted": true },
},
},
};aDimension: {
$type: 'dimension',
$value: {
default: {
value: { $alias: 'a.value', $mode: "default" },
unit: { $alias: 'a.unit', $mode: "default" },
},
},
},const dimensionTokens: SpecifyDesignTokenFormat = {
spacing: {
base: {
$type: "spacing",
$value: { default: { unit: "px", value: 4 }},
},
},
};const dimensionToken = {
$type: 'dimension', // Mandatory
$value: { // Mandatory
default: { // Stands for "default mode", mode name can be any string not starting with "$"
value: 1, unit: '%' // Must be a valid value or reference for the type
}
},
$description: 'A dimension token', // Optional string
$extensions: { 'com.specifyapp.data': true } // Optional Record<string, JSONValue>
}aDimension: {
$type: 'dimension',
$value: { $alias: 'a.reference.to.a.dimension' },
}aDimension: {
$type: 'dimension',
$value: {
small: { $alias: 'a.reference.to.a.small.dimension', $mode: 'customMode' }, // this is the mode level alias
large: { value: 1, unit: 'px' },
},
}aDimension: {
$type: 'dimension',
$value: {
default: {
value: { $alias: 'a.reference.to.a.number', $mode: 'small' },
unit: { $alias: 'a.reference.to.a.dimensionUnit', $mode: 'web' }
},
},
}const tokens = {
spacing: { // Group name
$description: 'All spacings for webapp', // Optional string
$extensions: { 'com.specifyapp.data': true } // Optional Record<string, JSONValue>
base: {
// ... token data
}
}
}color: {
$collection: { $modes: ['light', 'dark'] }, // $collection indicates this group is a collection
black: {
$type: 'color',
$value: {
light: { model: 'hex', hex: '#000000', alpha: 1 },
dark: { model: 'hex', hex: '#000000', alpha: 1 },
}
},
aGroup: { $description: 'This group is empty but shows it is allowed here' }
}{
"Colors": {
"$collection": { "$modes": ["Light", "Dark"] },
"Core": {
"blue 100": {
"$type": "color",
"$description": "token 1 aliased with n modes within collection within n groups",
"$value": {
"Light": {
"red": 255,
"blue": 255,
"alpha": 1,
"green": 255,
"model": "rgb"
},
"Dark": {
"red": 229,
"blue": 29,
"alpha": 1,
"green": 29,
"model": "rgb"
}
}
},
"blue 700": {
"$type": "color",
"$description": "token 2 aliased with n modes within collection within n groups",
"$value": {
"Light": {
"red": 255,
"blue": 255,
"alpha": 1,
"green": 200,
"model": "rgb"
},
"Dark": {
"red": 229,
"blue": 0,
"alpha": 1,
"green": 0,
"model": "rgb"
}
}
}
},
"semantic": {
"background": {
"button": {
"primary": {
"hover": {
"$type": "color",
"$description": "alias token with n modes within collection within n groups",
"$value": {
"Dark": {
"$mode": "dark",
"$alias": "Colors.Core.blue 100"
},
"Light": {
"$mode": "light",
"$alias": "Colors.Core.blue 700"
}
}
}
}
}
}
}
}
}interface parser {
name: 'change-case';
options: {
change?: 'names' | 'modes';
toCase:
| 'camelCase'
| 'capitalCase'
| 'constantCase'
| 'kebabCase'
| 'noCase'
| 'pascalCase'
| 'pascalSnakeCase'
| 'pathCase'
| 'sentenceCase'
| 'snakeCase'
| 'trainCase';
applyTo:
| { collection: string | true }
| { group: string | true }
| { token: string | true }
| SDTFQuery;
};
}npm install -D @specifyapp/sdk1.0.0-beta.5 @specifyapp/specify-design-token-formatyarn install -D @specifyapp/sdk @specifyapp/sdtfimport { createSpecifyClient } from '@specifyapp/sdk';
async function run() {
const specifyClient = createSpecifyClient();
await specifyClient.authenticate('<your-personal-access-token>');
const sdtfClient = specifyClient.getSDTFClientByName('<repository-name>');
}
run(){
"version": "2",
"repository": "@organization/repository",
"personalAccessToken": "<your-personal-access-token>",
"rules": []
}{
"version": "2",
"repository": "@organization/repository",
"personalAccessToken": "<your-personal-access-token>",
"rules": [
{
"name": "Tokens as CSS Variables",
"parsers": [
{
"name": "to-css-custom-properties",
"output": {
"type":"file",
"filePath": "tokens.css"
}
}
]
}
]
}specify pullimport { createSpecifyClient, createSpecifyFileSystemHelper } from '@specifyapp/sdk';
import { toCssCustomProperties } from '@specifyapp/sdk/next';
async function run() {
const specifyClient = createSpecifyClient();
await specifyClient.authenticate('<your-personal-access-token>');
const sdtfClient = specifyClient.getSDTFClientByName('<repository-name>');
const generatorPipelineOutput = await sdtfClient.createParserPipeline(
toCssCustomProperties({ filePath: 'myFile.css' }),
);
const fileSystemHelper = createSpecifyFileSystemHelper({ generatorPipelineOutput });
await fileSystemHelper.writeToDisk('./rootFolder');
}
run()import { createSpecifyClient, createSpecifyFileSystemHelper } from '@specifyapp/sdk';
async function run() {
const specifyClient = createSpecifyClient();
await specifyClient.authenticate('<your-personal-access-token>');
const sdtfClient = specifyClient.getSDTFClientByName('<repository-name>');
const pipeEngineRuleResponseBody = await sdtfClient.transformWithRemoteParsers([
{
name: 'to-css-custom-properties',
output: {type: 'file', filePath: 'tokens.css'},
},
]);
const fileSystemHelper = createSpecifyFileSystemHelper({
pipeEngineRuleResponseBody
});
const writtenFiles = await fileSystemHelper.writeToDisk('./public');
}
run(){
"version": "2",
"repository": "@organization/repository",
"personalAccessToken": "<your-personal-access-token>",
"rules": [
{
"name": "Tokens as CSS Variables",
"parsers": [
{
"name": "filter",
"options": {
"where": {
"collection": "colors",
"select": {
"collection": true,
"children": {
"tokens": true
}
}
}
}
},
{
"name": "to-css-custom-properties",
"output": {
"type":"file",
"filePath": "tokens.css"
}
}
]
}
]
}import { createSpecifyClient, createSpecifyFileSystemHelper } from '@specifyapp/sdk';
import { toCssCustomProperties } from '@specifyapp/sdk/next';
async function run() {
const specifyClient = createSpecifyClient();
await specifyClient.authenticate('<your-personal-access-token>');
const sdtfClient = specifyClient.getSDTFClientByName('<repository-name>');
const filteredGraph = sdtfClient.query({
where: {
collection: "colors",
select: {
collection: true,
children: {
tokens: true
}
}
}
});
const generatorPipelineOutput = await filteredGraph
.createParserPipeline(
toCssCustomProperties({ filePath: 'myFile.css' }),
)
.execute();
const fileSystemHelper = createSpecifyFileSystemHelper({ generatorPipelineOutput });
await fileSystemHelper.writeToDisk('./rootFolder');
}
run(){
"version": "2",
"repository": "@organization/repository",
"personalAccessToken": "<your-personal-access-token>",
"rules": [
{
"name": "Tokens as CSS Variables",
"parsers": [
{
"name": "convert-color",
"options": {
"toFormat": "hex"
}
},
{
"name": "to-css-custom-properties",
"output": {
"type":"file",
"filePath": "tokens.css"
}
}
]
}
]
}import { createSpecifyClient, createSpecifyFileSystemHelper } from '@specifyapp/sdk';
import { toCssCustomProperties, updaters } from '@specifyapp/sdk/next';
async function run() {
const specifyClient = createSpecifyClient();
await specifyClient.authenticate('<your-personal-access-token>');
const sdtfClient = specifyClient.getSDTFClientByName('<repository-name>');
sdtfClient.update(
updaters.color({ toFormat: 'hex' }, { where: { token: '^theme', select: true }})
);
const generatorPipelineOutput = await filteredGraph
.createParserPipeline(
toCssCustomProperties({ filePath: 'myFile.css' }),
)
.execute();
const fileSystemHelper = createSpecifyFileSystemHelper({ generatorPipelineOutput });
await fileSystemHelper.writeToDisk('./rootFolder');
}
run()import { createSpecifyClient } from '@specifyapp/sdk';
import {
dimensionToCss,
breakpointToCss,
colorToCss,
createResolveAliasStrategy
} from '@specify/sdk/css'
async function run() {
const specifyClient = createSpecifyClient();
await specifyClient.authenticate('<your-personal-access-token>');
const sdtfClient = specifyClient.getSDTFClientByName('<repository-name>');
const strategy = createResolveAliasStrategy()
const outputs = sdtfClient.mapTokenStates(tokenState =>
tokenState.matchByType(
{
dimension: dimensionToCss(strategy) // Output example: '12px'
breakpoint: breakpointToCss(strategy) // Output example: '12px'
color: colorToCss(strategy) // Output example: '#ff00ff'
},
_ => undefined
)
)
}
run()import { dimensionToCss, colorToCss, ... } from '@specifyapp/sdk/css';{
color: { model: 'hex', hex: '#ffffff', alpha: 0.5 },
style: 'dashed',
width: {
value: 12,
unit: 'px',
},
rectangleCornerRadii: null,
}'12px dashed #ffffff80'{
value: 12,
unit: 'rem'
}'12rem'{
model: 'rgb',
red: 12,
green: 12,
blue: 12,
alpha: 0.5,
}'rgba(12, 12, 12, 0.5)'{
model: 'hsb',
hue: 12,
saturation: 12,
brightness: 12,
alpha: 0.1,
}'hsva(12, 12%, 12%, 0.1)'{
model: 'hex',
hex: '#ff00ff',
alpha: 0.5,
}'#ff00ff80'{
model: 'hsl',
hue: 12,
saturation: 12,
lightness: 12,
alpha: 0.5,
}'hsla(12, 12%, 12%, 0.5)'{
model: 'lab',
bAxis: 12,
aAxis: 12,
lightness: 12,
alpha: 0.5,
}'lab(12% 12 12 / 0.5)'{
model: 'lch',
chroma: 12,
hue: 12,
lightness: 12,
alpha: 1,
}'lch(12% 12 12)'[0.12, 0.21, 0.12, 0.21]'cubic-bezier(0.12, 0.21, 0.12, 0.21)'{
value: 12,
unit: 'px'
}'12px'{
value: 1,
unit: 's'
}"1s"900"900'{
type: 'conic',
colorStops: [
{
color: {
model: 'hex',
hex: '#ffffff',
alpha: 1,
},
position: 0,
},
{
color: {
model: 'hex',
hex: '#ffff00',
alpha: 1,
},
position: 1,
},
],
angle: 12,
position: 'center',
}'conic-gradient(from 12deg at center, #ffffff 0%, #ffff00 100%)'{
type: 'linear',
colorStops: [
{
color: {
model: 'hex',
hex: '#ffffff',
alpha: 1,
},
position: 0,
},
{
color: {
model: 'hex',
hex: '#ffff00',
alpha: 1,
},
position: 1,
},
],
angle: 12,
}'linear-gradient(12deg, #ffffff 0%, #ffff00 100%)'{
type: 'radial',
colorStops: [
{
color: {
model: 'hex',
hex: '#ffffff',
alpha: 1,
},
position: 0,
},
{
color: {
model: 'hex',
hex: '#ffff00',
alpha: 1,
},
position: 1,
},
],
position: 'center',
}'radial-gradient(circle at center, #ffffff 0%, #ffff00 100%)'[
{
type: 'conic',
colorStops: [
{
color: {
model: 'hex',
hex: '#ffffff',
alpha: 1,
},
position: 0,
},
{
color: {
model: 'hex',
hex: '#ffff00',
alpha: 1,
},
position: 1,
},
],
angle: 12,
position: 'center',
},
{
type: 'linear',
colorStops: [
{
color: {
model: 'hex',
hex: '#ffffff',
alpha: 1,
},
position: 0,
},
{
color: {
model: 'hex',
hex: '#ffff00',
alpha: 1,
},
position: 1,
},
],
angle: 12,
},
]'conic-gradient(from 12deg at center, #ffffff 0%, #ffff00 100%), linear-gradient(12deg, #ffffff 0%, #ffff00 100%)'0.1'0.1'[
{ unit: 'px', value: 12 },
{ unit: '%', value: 24 },
]'12px 24%'{ unit: 'px', value: 24 }'24px'{
color: { model: 'hex', hex: '#ffffff', alpha: 1 },
offsetX: { value: 12, unit: 'px' },
offsetY: { value: 12, unit: 'px' },
blurRadius: { value: 12, unit: 'px' },
spreadRadius: { value: 12, unit: 'px' },
type: 'inner',
}'inset 12px 12px 12px 12px #ffffff'[
{
color: { model: 'hex', hex: '#ffffff', alpha: 1 },
offsetX: { value: 12, unit: 'px' },
offsetY: { value: 12, unit: 'px' },
blurRadius: { value: 12, unit: 'px' },
spreadRadius: { value: 12, unit: 'px' },
type: 'inner',
},
{
color: { model: 'hex', hex: '#ffffff', alpha: 1 },
offsetX: { value: 12, unit: 'px' },
offsetY: { value: 12, unit: 'px' },
blurRadius: { value: 12, unit: 'px' },
spreadRadius: { value: 12, unit: 'px' },
type: 'inner',
},
]'inset 12px 12px 12px 12px #ffffff, inset 12px 12px 12px 12px #ffffff'{ unit: 'px', value: 24 }'24px'[
{ unit: 'px', value: 12 },
{ unit: '%', value: 24 },
{ unit: 'rem', value: 4 },
]'12px 24% 4rem'{
stepsCount: 2,
jumpTerm: 'start',
}'steps(2, start)'10"10"{
family: 'fontFamily',
postScriptName: 'Postscript',
files: [],
weight: 'bold',
style: 'italic',
}{
'font-style': 'italic',
'font-family': "'Postscript'",
'font-weight': 'bold',
}{
font: {
family: 'textStyleFamily',
postScriptName: 'Postscript',
files: [],
weight: 'bold',
style: 'italic',
},
color: {
model: 'hex',
hex: '#ffffff',
alpha: 0.5,
},
fontSize: { value: 12, unit: 'em' },
fontFeatures: ['all-petite-caps'],
lineHeight: { value: 12, unit: 'rem' },
letterSpacing: { value: 12, unit: 'rem' },
paragraphSpacing: { value: 12, unit: 'rem' },
textAlignHorizontal: 'center',
textAlignVertical: 'bottom',
textDecoration: 'dashed',
textIndent: { value: 12, unit: 'rem' },
textTransform: 'capitalize',
}{
'font-style': 'italic',
'font-family': "'Postscript'",
'font-weight': 'bold',
'font-size': '12em',
color: '#ffffff80',
'text-indent': '12rem',
'line-height': '12rem',
'letter-spacing': '12rem',
'text-align': 'center',
'text-transform': 'capitalize',
'text-decoration': 'dashed',
}{
duration: {
value: 12,
unit: 's',
},
delay: {
value: 10,
unit: 'ms',
},
timingFunction: {
jumpTerm: 'end',
stepsCount: 2,
},
}{
delay: '10ms',
duration: '12s',
'timing-function': 'steps(2, end)',
}| 'camelCase'
| 'capitalCase'
| 'constantCase'
| 'kebabCase'
| 'noCase'
| 'pascalCase'
| 'pascalSnakeCase'
| 'pathCase'
| 'sentenceCase'
| 'snakeCase'
| 'trainCase'| { collection: string | true }
| { group: string | true }
| { token: string | true }
| SDTFQuery{
"version": "2",
"repository": "@organization/repository",
// Only use the personalAccessToken when working with the CLI
"personalAccessToken": "<your-personal-access-token>",
"rules": [
{
"name": "Format all token names and modes to kebabCase and generate tokens in JSON",
"parsers": [
{
"name": "change-case",
"options": {
"change": "names",
"toCase": "kebabCase",
"applyTo": {
"collection": true
}
}
},
{
"name": "change-case",
"options": {
"change": "modes",
"toCase": "kebabCase",
"applyTo": {
"collection": true
}
}
},
{
"name": "to-sdtf",
"output": {
"type": "file",
"filePath": "tokens.json"
}
}
]
}
]
}{
"colors": {
"$collection": { "$modes": ["light", "dark"] },
"core": {
"blue-100": {
"$type": "color",
"$description": "token 1 aliased with n modes within collection within n groups",
"$value": {
"light": {
"red": 255,
"blue": 255,
"alpha": 1,
"green": 255,
"model": "rgb"
},
"dark": {
"red": 229,
"blue": 29,
"alpha": 1,
"green": 29,
"model": "rgb"
}
}
},
"blue-700": {
"$type": "color",
"$description": "token 2 aliased with n modes within collection within n groups",
"$value": {
"light": {
"red": 255,
"blue": 255,
"alpha": 1,
"green": 200,
"model": "rgb"
},
"dark": {
"red": 229,
"blue": 0,
"alpha": 1,
"green": 0,
"model": "rgb"
}
}
}
},
"semantic": {
"background": {
"button": {
"primary": {
"hover": {
"$type": "color",
"$description": "alias token with n modes within collection within n groups",
"$value": {
"dark": {
"$mode": "dark",
"$alias": "colors.core.blue-100"
},
"light": {
"$mode": "light",
"$alias": "colors.core.blue-700"
}
}
}
}
}
}
}
}
}'names' | 'modes'{
"version": "2",
"repository": "@organization/repository",
"personalAccessToken": "<your-personal-access-token>",
"rules": [
{
"name": "Generate colors in HSL",
"parsers": [
{
"name": "filter",
"options": {
"query": {
"where": {
"token": ".*",
"withTypes": {
"include": [
"color"
]
},
"select": {
"parents": true
}
}
}
}
},
{
"name": "convert-color",
"options": {
"toFormat": "hsl",
"applyTo": {
"collection": true
}
}
},
{
"name": "change-case",
"options": {
"change": "names",
"toCase": "kebabCase",
"applyTo": {
"collection": true
}
}
},
{
"name": "change-case",
"options": {
"change": "modes",
"toCase": "kebabCase",
"applyTo": {
"collection": true
}
}
},
{
"name": "to-css-custom-properties",
"output": {
"type": "file",
"filePath": "output/colors.css"
}
}
]
},
{
"name": "Generate text styles as CSS classes",
"parsers": [
{
"name": "filter",
"options": {
"query": {
"where": {
"token": ".*",
"withTypes": {
"include": [
"textStyle"
]
},
"select": {
"token": true
}
}
}
}
},
{
"name": "change-case",
"options": {
"toCase": "kebabCase",
"applyTo": {
"token": true
}
}
},
{
"name": "make-line-height-relative",
"options": {}
},
{
"name": "convert-dimension",
"options": {
"applyToKeys": {
"textStyle": [
"fontSize"
]
},
"toFormat": "rem"
}
},
{
"name": "to-css-text-style",
"output": {
"type": "file",
"filePath": "output/text-styles.scss"
},
"options": {
"genericFamily": "sans-serif",
"tokenNameTemplate": "text-style-{{token}}"
}
}
]
},
{
"name": "Optimize and transform vectors with svgo + Generate SVG files",
"parsers": [
{
"name": "svgo",
"output": {
"type": "directory",
"directoryPath": "output/assets"
},
"options": {
"svgo": {
"plugins": [
{
"name": "removeDimensions"
},
{
"name": "convertColors",
"params": {
"currentColor": true
}
}
]
}
}
}
]
}
]
}{
"version": "2",
"head": "specifyrc-json",
"base": "main",
"repository": "@organization/repository",
"rules": [
{
"name": "Generate colors in HSL",
"parsers": [
{
"name": "filter",
"options": {
"query": {
"where": {
"token": ".*",
"withTypes": {
"include": [
"color"
]
},
"select": {
"parents": true
}
}
}
}
},
{
"name": "convert-color",
"options": {
"toFormat": "hsl",
"applyTo": {
"collection": true
}
}
},
{
"name": "change-case",
"options": {
"change": "names",
"toCase": "kebabCase",
"applyTo": {
"collection": true
}
}
},
{
"name": "change-case",
"options": {
"change": "modes",
"toCase": "kebabCase",
"applyTo": {
"collection": true
}
}
},
{
"name": "to-css-custom-properties",
"output": {
"type": "file",
"filePath": "tokens.css"
}
}
]
},
{
"name": "Generate text styles as CSS classes",
"parsers": [
{
"name": "filter",
"options": {
"query": {
"where": {
"token": ".*",
"withTypes": {
"include": [
"textStyle"
]
},
"select": {
"token": true
}
}
}
}
},
{
"name": "change-case",
"options": {
"toCase": "kebabCase",
"applyTo": {
"token": true
}
}
},
{
"name": "make-line-height-relative",
"options": {}
},
{
"name": "convert-dimension",
"options": {
"applyToKeys": {
"textStyle": [
"fontSize"
]
},
"toFormat": "rem"
}
},
{
"name": "to-css-text-style",
"output": {
"type": "file",
"filePath": "public/text-styles.scss"
},
"options": {
"genericFamily": "sans-serif",
"tokenNameTemplate": "text-style-{{token}}"
}
}
]
},
{
"name": "Optimize and transform vectors with svgo + Generate SVG files",
"parsers": [
{
"name": "svgo",
"output": {
"type": "directory",
"directoryPath": "output/assets"
},
"options": {
"svgo": {
"plugins": [
{
"name": "removeDimensions"
},
{
"name": "convertColors",
"params": {
"currentColor": true
}
}
]
}
}
}
]
}
]
}{
"Foundation": {
"spacing": {
"1": {
"$type": "dimension",
"$value": {
"default": {
"value": 4,
"unit": "px"
}
}
},
"2": {
"$type": "dimension",
"$value": {
"default": {
"value": 8,
"unit": "px"
}
}
},
"3": {
"$type": "dimension",
"$value": {
"default": {
"value": 12,
"unit": "px"
}
}
}
}
}
}{
"version": "2",
"repository": "@organization/repository",
"personalAccessToken": "<your-personal-access-token>",
"rules": [
{
"name": "Convert spacing in rem and generate tokens in JSON",
"parsers": [
{
"name": "convert-dimension",
"options": {
"toFormat": "rem"
}
},
{
"name": "to-sdtf",
"output": {
"type": "file",
"filePath": "tokens.json"
}
}
]
}
]
}{
"Foundation": {
"spacing": {
"1": {
"$type": "dimension",
"$value": {
"default": {
"value": 0.25,
"unit": "rem"
}
}
},
"2": {
"$type": "dimension",
"$value": {
"default": {
"value": 0.5,
"unit": "rem"
}
}
},
"3": {
"$type": "dimension",
"$value": {
"default": {
"value": 0.75,
"unit": "rem"
}
}
}
}
}
}{
"Foundation": {
"spacing": {
"1": {
"$type": "dimension",
"$value": {
"default": {
"value": 4,
"unit": "px"
}
}
},
"2": {
"$type": "dimension",
"$value": {
"default": {
"value": 8,
"unit": "px"
}
}
},
"3": {
"$type": "dimension",
"$value": {
"default": {
"value": 12,
"unit": "px"
}
}
}
}
}
}{
"version": "2",
"repository": "@organization/repository",
// Only use the personalAccessToken when working with the CLI
"personalAccessToken": "<your-personal-access-token>",
"rules": [
{
"name": "Convert spacing in rem and generate tokens in JSON",
"parsers": [
{
"name": "convert-dimension",
"options": {
"toFormat": null
}
},
{
"name": "to-sdtf",
"output": {
"type": "file",
"filePath": "tokens.json"
}
}
]
}
]
}{
"Foundation": {
"spacing": {
"1": {
"$type": "dimension",
"$value": {
"default": {
"value": 0.25,
"unit": null
}
}
},
"2": {
"$type": "dimension",
"$value": {
"default": {
"value": 0.5,
"unit": null
}
}
},
"3": {
"$type": "dimension",
"$value": {
"default": {
"value": 0.75,
"unit": null
}
}
}
}
}
}{
"Text styles": {
"Body": {
"$type": "textStyle",
"$value": {
"default": {
"font": {
"family": "Neue Haas Grotesk Text Pro",
"postScriptName": "Neue Haas Grotesk Text Pro",
"weight": "roman",
"style": "normal",
"files": []
},
"fontSize": {
"value": 14,
"unit": "px"
},
"color": null,
"fontFeatures": null,
"lineHeight": {
"value": 150,
"unit": "%"
},
"letterSpacing": {
"value": 0.2,
"unit": "px"
},
"paragraphSpacing": {
"value": 0,
"unit": "px"
},
"textAlignHorizontal": null,
"textAlignVertical": null,
"textDecoration": "none",
"textIndent": {
"value": 0,
"unit": "px"
},
"textTransform": "none"
}
}
}
}
}{
"version": "2",
"repository": "@organization/repository",
// Only use the personalAccessToken when working with the CLI
"personalAccessToken": "<your-personal-access-token>",
"rules": [
{
"name": "Convert font-sizes to rem",
"parsers": [
{
"name": "convert-dimension",
"options": {
"applyToKeys": {
"textStyle": [
"fontSize"
]
},
"toFormat": "rem"
}
},
{
"name": "to-sdtf",
"output": {
"type": "file",
"filePath": "public/tokens.json"
}
}
]
}
]
}{
"Text styles": {
"Body": {
"$type": "textStyle",
"$value": {
"default": {
"font": {
"family": "Neue Haas Grotesk Text Pro",
"postScriptName": "Neue Haas Grotesk Text Pro",
"weight": "roman",
"style": "normal",
"files": []
},
"fontSize": {
"value": 0.875,
"unit": "rem"
},
"color": null,
"fontFeatures": null,
"lineHeight": {
"value": 150,
"unit": "%"
},
"letterSpacing": {
"value": 0.2,
"unit": "px"
},
"paragraphSpacing": {
"value": 0,
"unit": "px"
},
"textAlignHorizontal": null,
"textAlignVertical": null,
"textDecoration": "none",
"textIndent": {
"value": 0,
"unit": "px"
},
"textTransform": "none"
}
}
}
}
}interface parser {
name: 'convert-dimension';
options: {
toFormat:
| '%'
| 'px'
| 'em'
| 'rem'
| 'pt'
| 'pc'
| 'in'
| 'cm'
| 'mm'
| 'ex'
| 'cap'
| 'ch'
| 'ic'
| 'lh'
| 'rlh'
| 'vw'
| 'svw'
| 'lvw'
| 'dvw'
| 'vh'
| 'svh'
| 'lvh'
| 'dvh'
| 'vi'
| 'svi'
| 'lvi'
| 'dvi'
| 'vb'
| 'svb'
| 'lvb'
| 'dvb'
| 'vmin'
| 'svmin'
| 'lvmin'
| 'dvmin'
| 'vmax'
| 'svmax'
| 'lvmax'
| 'dvmax'
| null;
baseValue?: {
rem?: number
};
applyTo?: SDTFQuery;
applyToKeys?: {
textStyle?: Array<'fontSize' | 'lineHeight' | 'letterSpacing' | 'paragraphSpacing'| 'textIndent'>,
shadow?: Array<'offsetX' | 'offsetY' | 'blurRadius' | 'spreadRadius'>,
border?: Array<'width' | 'rectangleCornerRadii'>,
};
excludeFormats?: array;
includeFormats?: array;
};
}{ rem: number }| { collection: string | true }
| { group: string | true }
| { token: string | true }
| SDTFQuery{ token: true }{
textStyle?: Array<'fontSize' | 'lineHeight' | 'letterSpacing' | 'paragraphSpacing'| 'textIndent'>,
shadow?: Array<'offsetX' | 'offsetY' | 'blurRadius' | 'spreadRadius'>,
border?: Array<'width' | 'rectangleCornerRadii'>,
}| '%'
| 'px'
| 'em'
| 'rem'
| 'pt'
| 'pc'
| 'in'
| 'cm'
| 'mm'
| 'ex'
| 'cap'
| 'ch'
| 'ic'
| 'lh'
| 'rlh'
| 'vw'
| 'svw'
| 'lvw'
| 'dvw'
| 'vh'
| 'svh'
| 'lvh'
| 'dvh'
| 'vi'
| 'svi'
| 'lvi'
| 'dvi'
| 'vb'
| 'svb'
| 'lvb'
| 'dvb'
| 'vmin'
| 'svmin'
| 'lvmin'
| 'dvmin'
| 'vmax'
| 'svmax'
| 'lvmax'
| 'dvmax'
| nullmodule.exports = {
version: '2'
repository: '@acme-inc/all-design-data-v2',
personalAccessToken: '<your-personal-access-token>',
rules: [],
};{
"version": "2"
"repository": "@acme-inc/all-design-data-v2",
"personalAccessToken": "<your-personal-access-token>",
"rules": []
}module.exports = {
version: '2'
repository: '@workspace/repository',
personalAccessToken: '<your-personal-access-token>',
rules: [],
};{
"version": "2"
"repository": "@workspace/repository",
"personalAccessToken": "<your-personal-access-token>",
"rules": []
}{
version: '2',
repository: '@organization/repository',
personalAccessToken: '<your-personal-access-token>',
rules: [
{
name: 'css',
parsers: [
{
name: 'filter',
options: {
query: {
where: {
collection: '^Colors$',
select: {
children: true
}
}
}
}
},
{
name: 'convert-color',
options: {
toFormat: 'hsl',
applyTo: {
collection: true
}
}
},
{
name: 'change-case',
options: {
change: 'names',
toCase: 'kebabCase',
applyTo: {
collection: true
}
}
},
{
name: 'change-case',
options: {
change: 'modes',
toCase: 'kebabCase',
applyTo: {
collection: true
}
}
},
{
name: 'to-css-custom-properties',
output: {
type: 'file',
filePath: 'tokens.css'
},
},
],
},
],
};{
"version": "2",
"repository": "@organization/repository",
"personalAccessToken": "<your-personal-access-token>",
"rules": [
{
"name": "css",
"parsers": [
{
"name": "filter",
"options": {
"query": {
"where": {
"collection": "Colors",
"select": {
"parents": true,
"children": true
}
}
}
}
},
{
"name": "convert-color",
"options": {
"toFormat": "hsl",
"applyTo": {
"collection": true
}
}
},
{
"name": "change-case",
"options": {
"change": "names",
"toCase": "kebabCase",
"applyTo": {
"collection": true
}
}
},
{
"name": "change-case",
"options": {
"change": "modes",
"toCase": "kebabCase",
"applyTo": {
"collection": true
}
}
},
{
"name": "to-css-custom-properties",
"output": {
"type": "file",
"filePath": "tokens.css"
}
}
]
}
]
}module.exports = {
version: '2',
repository: '@acme-inc/design-system',
personalAccessToken: '<your-personal-access-token>',
rules: [
{
name: 'Generate colors as CSS Custom Properties',
parsers: [
{
name: 'to-css-custom-properties',
output: {
type: 'file',
filePath: 'colors.css'
},
},
],
},
],
};{
"version": "2",
"repository": "@acme-inc/color-themes",
"personalAccessToken": "<your-personal-access-token>",
"rules": [
{
"name": "Generate colors as CSS Custom Properties",
"parsers": [
{
"name": "to-css-custom-properties",
"output": {
"type": "file",
"filePath": "colors.css"
}
}
]
}
]
}module.exports = {
version: '2',
repository: '@acme-inc/design-system',
personalAccessToken: '<your-personal-access-token>',
rules: [
{
name: 'Generate colors as CSS Custom Properties',
parsers: [
{
name: 'convert-color',
options: {
toFormat: 'rgb',
applyTo: {
collection: true
}
}
},
{
name: 'to-css-custom-properties',
output: {
type: 'file',
filePath: 'colors.css'
},
options: {
tokenNameTemplate: '--{{groups}}-{{token}}',
selectorTemplate: '[data-theme=\'{{mode}}\']',
includeCoreTokensInScopes: true
},
},
],
},
],
};
{
"version": "2",
"repository": "@acme-inc/design-system",
"personalAccessToken": "<your-personal-access-token>",
"rules": [
{
"name": "Generate colors as CSS Custom Properties",
"parsers": [
{
"name": "convert-color",
"options": {
"toFormat": "rgb",
"applyTo": {
"collection": true
}
}
},
{
"name": "to-css-custom-properties",
"output": {
"type": "file",
"filePath": "colors.css"
},
"options": {
"tokenNameTemplate": "--{{groups}}-{{token}}",
"selectorTemplate": "[data-theme=\"{{mode}}\"]",
"includeCoreTokensInScopes": true
}
}
]
}
]
}{
"colors": {
"$collection": { "$modes": ["Light", "Dark"] },
"core": {
"blue-100": {
"$type": "color",
"$description": "token 1 aliased with n modes within collection within n groups",
"$value": {
"Light": {
"red": 219,
"blue": 254,
"alpha": 1,
"green": 236,
"model": "rgb"
},
"Dark": {
"red": 41,
"blue": 67,
"alpha": 1,
"green": 52,
"model": "rgb"
}
}
},
"blue-700": {
"$type": "color",
"$description": "token 2 aliased with n modes within collection within n groups",
"$value": {
"Light": {
"red": 17,
"blue": 249,
"alpha": 1,
"green": 125,
"model": "rgb"
},
"Dark": {
"red": 96,
"blue": 250,
"alpha": 1,
"green": 168,
"model": "rgb"
}
}
}
},
"semantic": {
"background": {
"button": {
"primary": {
"hover": {
"$type": "color",
"$description": "alias token with n modes within collection within n groups",
"$value": {
"Dark": {
"$mode": "dark",
"$alias": "colors.core.blue-100"
},
"Light": {
"$mode": "light",
"$alias": "colors.core.blue-700"
}
}
}
}
}
}
}
}
}[data-theme="dark"] {
--core-blue-100: rgb(41, 52, 67);
--core-blue-700: rgb(96, 168, 250);
--semantic-background-button-primary-hover: var(--core-blue-100);
}
[data-theme="light"] {
--core-blue-100: rgb(219, 236, 254);
--core-blue-700: rgb(17, 125, 249);
--semantic-background-button-primary-hover: var(--core-blue-700);
}{
"colors": {
"$collection": {
"$modes": [
"Light",
"Dark"
]
},
"core": {
"blue-100": {
"$type": "color",
"$description": "token 1 aliased with n modes within collection within n groups",
"$value": {
"Light": {
"red": 219,
"blue": 254,
"alpha": 1,
"green": 236,
"model": "rgb"
}
}
}
}
}
}
{
"colors": {
"$collection": {
"$modes": [
"light",
"dark"
]
},
"aliases": {
"border": {
"active": {
"$type": "color",
"$value": {
"dark": {
"$alias": "colors.core.label.blue-base",
"$mode": "dark"
},
"light": {
"$alias": "colors.core.label.blue-base",
"$mode": "light"
}
}
}
}
},
"core": {
"label": {
"blue-base": {
"$type": "color",
"$value": {
"dark": {
"model": "rgb",
"red": 96,
"green": 168,
"blue": 250,
"alpha": 1
},
"light": {
"model": "rgb",
"red": 17,
"green": 125,
"blue": 249,
"alpha": 1
}
}
},
"blue-lighter": {
"$type": "color",
"$value": {
"dark": {
"model": "rgb",
"red": 41,
"green": 52,
"blue": 67,
"alpha": 1
},
"light": {
"model": "rgb",
"red": 219,
"green": 236,
"blue": 254,
"alpha": 1
}
}
}
}
}
},
"dimensions": {
"$collection": {
"$modes": [
"desktop",
"mobile"
]
},
"base": {
"dimension-01": {
"$type": "dimension",
"$value": {
"mobile": {
"value": 2,
"unit": "px"
},
"desktop": {
"value": 4,
"unit": "px"
}
}
},
"dimension-02": {
"$type": "dimension",
"$value": {
"mobile": {
"value": 4,
"unit": "px"
},
"desktop": {
"value": 8,
"unit": "px"
}
}
}
}
}
}{
"version": "2",
"repository": "@organization/repository",
// Only use the personalAccessToken when working with the CLI
"personalAccessToken": "<your-personal-access-token>",
"rules": [
{
"name": "Generate tokens as a Tailwind theme",
"parsers": [
{
"name": "to-tailwind",
"output": {
"type": "file",
"filePath": "theme.js"
}
}
]
}
]
}/** @type {import('tailwindcss').Config} */
module.exports = {
theme: {
extend: {
colors: {
colors: {
core: {
label: {
'blue-lighter': {
'dark': 'rgb(41, 52, 67)',
'light': 'rgb(219, 236, 254)'
},
'blue-base': {
'dark': 'rgb(96, 168, 250)',
'light': 'rgb(17, 125, 249)'
}
}
},
aliases: {
border: {
active: {
'dark': 'rgb(98, 77, 227)',
'light': 'rgb(235, 33, 33)'
}
}
}
}
},
spacing: {
'dimensions-base-dimension-01-desktop': '4px',
'dimensions-base-dimension-01-mobile': '2px',
'dimensions-base-dimension-02-desktop': '8px',
'dimensions-base-dimension-02-mobile': '4px'
}
}
}
}interface parser {
name: 'to-tailwind';
options: {
removeSingleMode: boolean;
removeModesIfSameValue: boolean;
};
output: {
type: 'file';
filePath: string; // e.g theme.js
};
}Learn more about how to query your SDTF token graph.
Type Query = { where: Where | Array<Where> }type WhereToken = {
token:
| string
| {
name?: string;
description?: string?;
}
select:
| true
| {
token?: boolean;
parents?:
| true
| {
groups?: true;
collections?: true;
}
}
}type WhereGroup = {
group: string;
select:
| true
| {
group?: boolean;
parents?:
| true
| {
groups?: true;
collections?: true;
}
children:
| true
| {
groups?: true;
collections?: true;
tokens?: true;
}
}
}type WhereCollection = {
collection: string;
select:
| true
| {
collection?: boolean;
parents?:
| true
| {
groups?: true;
}
children:
| true
| {
groups?: true;
tokens?: true;
}
}
}{
"primitive": {
"$description": "`primitive` is a group used for semantic grouping.",
"spacing": {
"1": {
"$type": "dimension",
"$value": {
"default": {
"value": 4,
"unit": "px"
}
}
}
}
},
"Colors": {
"$description": "`Colors` is a collection.",
"$collection": {
"$modes": [
"default"
]
},
"black": {
"$type": "color",
"$value": {
"default": {
"model": "hex",
"hex": "#000000",
"alpha": 1
}
}
},
"white": {
"$type": "color",
"$value": {
"default": {
"model": "hex",
"hex": "#FFFFFF",
"alpha": 1
}
}
}
}
}{
"version": "2",
"repository": "@organization/repository",
"personalAccessToken": "<your-personal-access-token>",
"rules": [
{
"name": "Get tokens from collection named 'Colors'",
"parsers": [
{
"name": "filter",
"options": {
"query": {
"where": {
"collection": "^Colors$",
"select": {
"parents": true,
"children": true
}
}
}
}
}
]
}
]
}{
"Colors": {
"$collection": {
"$modes": [
"default"
]
},
"black": {
"$type": "color",
"$value": {
"default": {
"model": "hex",
"hex": "#000000",
"alpha": 1
}
}
},
"white": {
"$type": "color",
"$value": {
"default": {
"model": "hex",
"hex": "#FFFFFF",
"alpha": 1
}
}
}
}
}{
"primitive": {
"$description": "`primitive` is a group used for semantic grouping.",
"spacing": {
"1": {
"$type": "dimension",
"$description": "`primitive.spacing.1` is a dimension token without modes.",
"$value": {
"default": {
"value": 4,
"unit": "px"
}
}
}
}
},
"Core - Colors": {
"$collection": {
"$modes": [
"default"
]
},
"black": {
"$type": "color",
"$value": {
"default": {
"model": "hex",
"hex": "#000000",
"alpha": 1
}
}
},
"white": {
"$type": "color",
"$value": {
"default": {
"model": "hex",
"hex": "#FFFFFF",
"alpha": 1
}
}
}
},
"Core - Spacing": {
"$collection": {
"$modes": [
"default"
]
},
"space-1": {
"$type": "spacing",
"$value": {
"default": { "value": 1, "unit": "px" }
}
},
"space-2": {
"$type": "spacing",
"$value": {
"default": { "value": 2, "unit": "px" }
}
}
}
}{
"version": "2",
"repository": "@organization/repository",
"personalAccessToken": "<your-personal-access-token>",
"rules": [
{
"name": "Get tokens from all collections whose names contain 'Core'",
"parsers": [
{
"name": "filter",
"options": {
"where": {
"collection": "Core",
"select": {
"collection": true,
"children": {
"tokens": true
}
}
}
}
}
]
}
]
}{
"Core - Colors": {
"$collection": {
"$modes": [
"default"
]
},
"black": {
"$type": "color",
"$value": {
"default": {
"model": "hex",
"hex": "#000000",
"alpha": 1
}
}
},
"white": {
"$type": "color",
"$value": {
"default": {
"model": "hex",
"hex": "#FFFFFF",
"alpha": 1
}
}
}
},
"Core - Spacing": {
"$collection": {
"$modes": [
"default"
]
},
"space-1": {
"$type": "spacing",
"$value": {
"default": {
"value": 1,
"unit": "px"
}
}
},
"space-2": {
"$type": "spacing",
"$value": {
"default": {
"value": 2,
"unit": "px"
}
}
}
}
}{
"primitive": {
"$description": "`primitive` is a group used for semantic grouping.",
"spacing": {
"1": {
"$type": "dimension",
"$description": "`primitive.spacing.1` is a dimension token without modes.",
"$value": {
"default": {
"value": 4,
"unit": "px"
}
}
}
},
"font": {
"interBold": {
"$type": "font",
"$value": {
"default": {
"family": "Inter",
"postScriptName": "Inter Bold",
"weight": "bold",
"style": "normal",
"files": [
{
"format": "ttf",
"url": "https://static.specifyapp.com/sdtf-seeds/inter-bold.ttf",
"provider": "Specify"
}
]
}
}
}
}
},
"Text Styles": {
"heading": {
"$type": "textStyle",
"$value": {
"default": {
"font": {
"$alias": "primitive.font.interBold",
"$mode": "default"
},
"color": null,
"fontSize": {
"value": 32,
"unit": "px"
},
"lineHeight": {
"value": 40,
"unit": "px"
},
"fontFeatures": null,
"letterSpacing": null,
"paragraphSpacing": null,
"textAlignHorizontal": null,
"textAlignVertical": null,
"textDecoration": null,
"textIndent": null,
"textTransform": null
}
}
},
"display": {
"$type": "textStyle",
"$value": {
"default": {
"font": {
"$alias": "primitive.font.interBold",
"$mode": "default"
},
"color": null,
"fontSize": {
"value": 56,
"unit": "px"
},
"lineHeight": {
"value": 64,
"unit": "px"
},
"fontFeatures": null,
"letterSpacing": {
"value": -1,
"unit": "px"
},
"paragraphSpacing": null,
"textAlignHorizontal": null,
"textAlignVertical": null,
"textDecoration": null,
"textIndent": null,
"textTransform": null
}
}
}
}
}{
"version": "2",
"repository": "@organization/repository",
"personalAccessToken": "<your-personal-access-token>",
"rules": [
{
"name": "Get tokens from the group named 'Text Styles'",
"parsers": [
{
"name": "filter",
"options": {
"query": {
"where": {
"group": "^Text Styles$",
"select": {
"parents": true,
"children": true
}
}
}
}
}
]
}
]
}{
"Text Styles": {
"display": {
"$type": "textStyle",
"$value": {
"default": {
"fontSize": {
"value": 56,
"unit": "px"
},
"color": null,
"fontFeatures": null,
"lineHeight": {
"value": 64,
"unit": "px"
},
"letterSpacing": {
"value": -1,
"unit": "px"
},
"paragraphSpacing": null,
"textAlignHorizontal": null,
"textAlignVertical": null,
"textDecoration": null,
"textIndent": null,
"textTransform": null,
"font": {
"$alias": "primitive.font.interBold",
"$mode": "default"
}
}
}
},
"heading": {
"$type": "textStyle",
"$value": {
"default": {
"fontSize": {
"value": 32,
"unit": "px"
},
"color": null,
"fontFeatures": null,
"lineHeight": {
"value": 40,
"unit": "px"
},
"letterSpacing": null,
"paragraphSpacing": null,
"textAlignHorizontal": null,
"textAlignVertical": null,
"textDecoration": null,
"textIndent": null,
"textTransform": null,
"font": {
"$alias": "primitive.font.interBold",
"$mode": "default"
}
}
}
}
}
}{
"Android": {
"$collection": {
"$modes": [
"default"
]
},
"black": {
"$type": "color",
"$value": {
"default": {
"model": "hex",
"hex": "#000000",
"alpha": 1
}
}
},
"white": {
"$type": "color",
"$value": {
"default": {
"model": "hex",
"hex": "#FFFFFF",
"alpha": 1
}
}
}
},
"primitive": {
"gray": {
"0": {
"$type": "color",
"$value": {
"default": {
"model": "hex",
"hex": "#f8f9fa",
"alpha": 1
}
}
},
"9": {
"$type": "color",
"$value": {
"default": {
"model": "hex",
"hex": "#212529",
"alpha": 1
}
}
}
}
}
}{
"version": "2",
"repository": "@organization/repository",
"personalAccessToken": "<your-personal-access-token>",
"rules": [
{
"name": "Get color tokens from the 'Android' collection",
"parsers": [
{
"name": "filter",
"options": {
"query": {
"where": {
"collection": "^Android$",
"andWhere": {
"token": ".*",
"withTypes": { "include": ["color"] },
"select": {
"token": true,
"parents": {
"collections": true
}
}
}
}
}
}
}
]
}
]
}{
"Android": {
"$collection": {
"$modes": [
"default"
]
},
"black": {
"$type": "color",
"$value": {
"default": {
"model": "hex",
"hex": "#000000",
"alpha": 1
}
}
},
"white": {
"$type": "color",
"$value": {
"default": {
"model": "hex",
"hex": "#FFFFFF",
"alpha": 1
}
}
}
}
}{
"Android": {
"$collection": {
"$modes": [
"default"
]
},
"primitive": {
"gray": {
"$type": "color",
"$value": {
"default": {
"model": "hex",
"hex": "#f8f9fa",
"alpha": 1
}
}
}
},
"components": {
"black": {
"$type": "color",
"$value": {
"default": {
"model": "hex",
"hex": "#000000",
"alpha": 1
}
}
},
"white": {
"$type": "color",
"$value": {
"default": {
"model": "hex",
"hex": "#FFFFFF",
"alpha": 1
}
}
}
}
}
}{
"version": "2",
"repository": "@organization/repository",
"personalAccessToken": "<your-personal-access-token>",
"rules": [
{
"name": "Get color tokens from the 'Android' collection and from all groups named 'components'",
"parsers": [
{
"name": "filter",
"options": {
"query": {
"where": {
"collection": "^Android$",
"andWhere": {
"group": "^components$",
"andWhere": {
"token": ".*",
"withTypes": {
"include": ["color"]
},
"select": {
"token": true,
"parents": true
}
}
}
}
}
}
}
]
}
]
}{
"Android": {
"$collection": {
"$modes": [
"default"
]
},
"components": {
"black": {
"$type": "color",
"$value": {
"default": {
"model": "hex",
"hex": "#000000",
"alpha": 1
}
}
},
"white": {
"$type": "color",
"$value": {
"default": {
"model": "hex",
"hex": "#FFFFFF",
"alpha": 1
}
}
}
}
}
}{
"group1": {
"token1": {
"$type": "color",
"$value": {
"default": {
"model": "hex",
"hex": "#000000",
"alpha": 1
}
}
}
},
"group2": {
"token2": {
"$type": "color",
"$value": {
"default": {
"model": "hex",
"hex": "#FFFFFF",
"alpha": 1
}
}
}
},
"group3": {
"token3": {
"$type": "color",
"$value": {
"default": {
"model": "hex",
"hex": "#FFFFFF",
"alpha": 1
}
}
}
}
}{
"version": "2",
"repository": "@organization/repository",
"personalAccessToken": "<your-personal-access-token>",
"rules": [
{
"name": "Get tokens from the group named 'Components' and/or from the group named 'Semantic'",
"parsers": [
{
"name": "filter",
"options": {
"query": {
"where": {
"group": "^group1$|^group2$",
"andWhere": {
"token": ".*",
"select": {
"token": true,
"parents": true
}
}
}
}
}
}
]
}
]
}{
"group1": {
"token1": {
"$type": "color",
"$value": {
"default": {
"model": "hex",
"hex": "#000000",
"alpha": 1
}
}
}
},
"group2": {
"token2": {
"$type": "color",
"$value": {
"default": {
"model": "hex",
"hex": "#FFFFFF",
"alpha": 1
}
}
}
}
}{
"dimensions": {
"spacing": {
"1": {
"$type": "dimension",
"$value": {
"default": {
"value": 4,
"unit": "px"
}
}
}
}
},
"colors": {
"black": {
"$type": "color",
"$value": {
"default": {
"model": "hex",
"hex": "#000000",
"alpha": 1
}
}
}
}
}{
"version": "2",
"repository": "@organization/repository",
"personalAccessToken": "<your-personal-access-token>",
"rules": [
{
"name": "Get color tokens from the 'Android' collection and from all groups named 'components'",
"parsers": [
{
"name": "filter",
"options": {
"query": {
"where": {
"token": ".*",
"withTypes": {
"include": [
"color"
]
},
"select": {
"parents": true
}
}
}
}
}
]
}
]
}{
"colors": {
"black": {
"$type": "color",
"$value": {
"default": {
"model": "hex",
"hex": "#000000",
"alpha": 1
}
}
}
}
}

